Someone put together this 5-step generic process for learning things, based at least partially on the work of neuroscientist Andrew Huberman. I found that what I do, after many years of trial and error, is very similar, so I recast it into 5-steps for autocross.
1. Don’t just walk the course over and over and expect to remember it. Use Active Recall, meaning you must force yourself to remember. The struggle to recall is what convinces the brain that you’re serious. Otherwise, it will just throw that junk away… 70% will be gone within 24 hours.
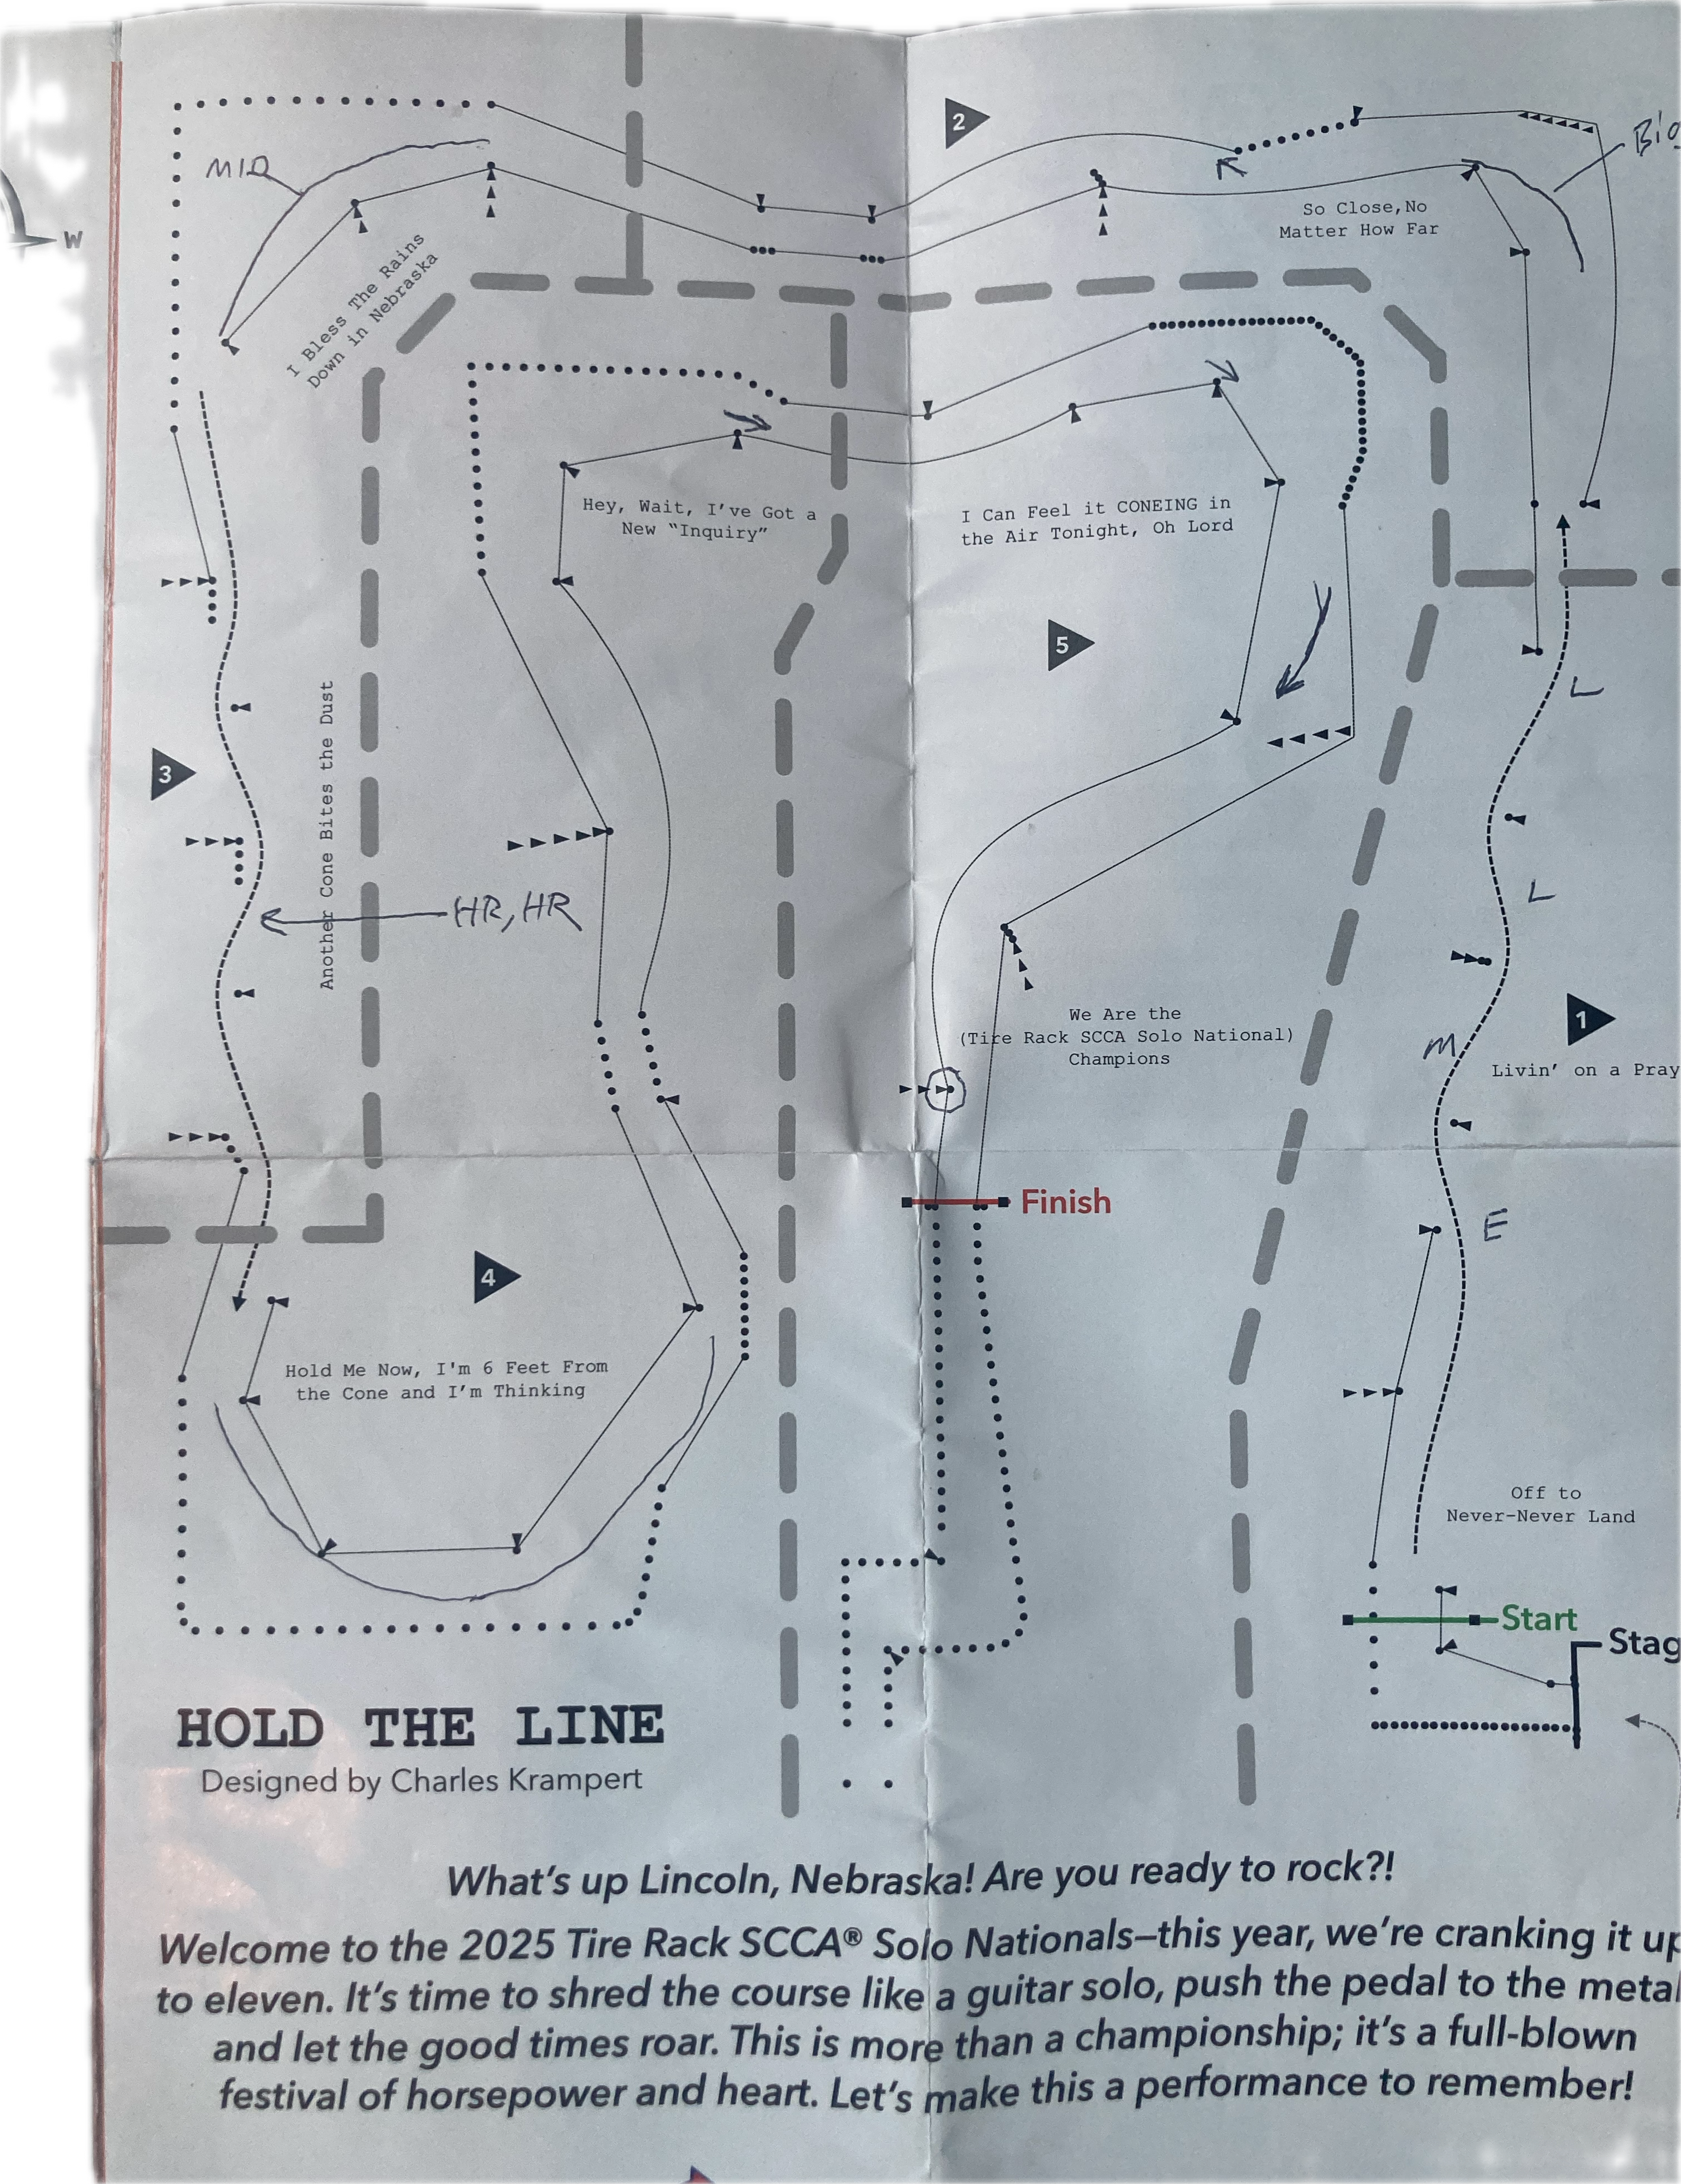
2. Work with chunks, like “turn right to the start line, accelerate and enter a 5-cone slalom.” (See map below!) Add one chunk to the next until you have the entire course. Active recall can quickly become mentally practice-driving the course. But, you must have broken the course up into meaningful, describable sections. The next chunk from the map below might be “brake and set up right for a 90-degree left turn then accelerate into a series of offsets.”
3. Space out the active recalls over time, starting with seconds, then minutes, then hours.
4. Make time to recall what you want to remember before you’ve forgotten it.
5. When you do forget a part (and you will) refer back to the course map. You did draw a course map, didn’t you?
Do this consistently for each event, even if the course is so simple you can just drive what you see, to get very good at learning courses in increasing detail over time. In the beginning this means you won’t get lost on the first run. Later it means you can plan your line in great detail and mentally practice driving it. Finally, you won’t need to walk long courses more times than you have time for or more times than your body can withstand.
My last event before ’24 Nats was the Grissom (Peru) Tour in August where my performance was a little strange. Day one I had good first and second runs which placed me 3rd, the last trophy position. I was thrilled! The drivers in first and second were known-quantity, very fast drivers who were 2nd & 14th of 56 in CS at Nats the year before. Run three I was significantly slower, but still barely hanging on to 3rd on the strength of run 2.
Day 2 I was slow all three runs and didn’t really know why, except more mistakes seemed to be creeping in than usual. I slipped to fourth. No first national trophy for the Cayman.
At the time I attributed it to the Clark/Teller/Clark(nee King)/King brain trust that I was competing against. It was Will King that relieved me of that 3rd place trophy. I figured they had all analyzed data together and found where he could get faster and dust off this pesky Cayman. I felt like asking them to review my data too. They’re all such nice bunch, who knows, they might have done it!
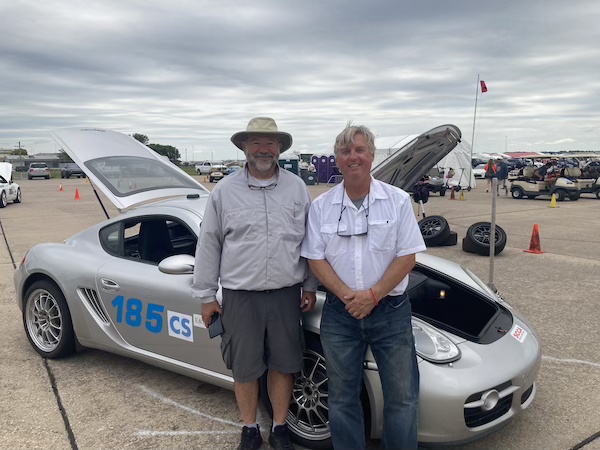
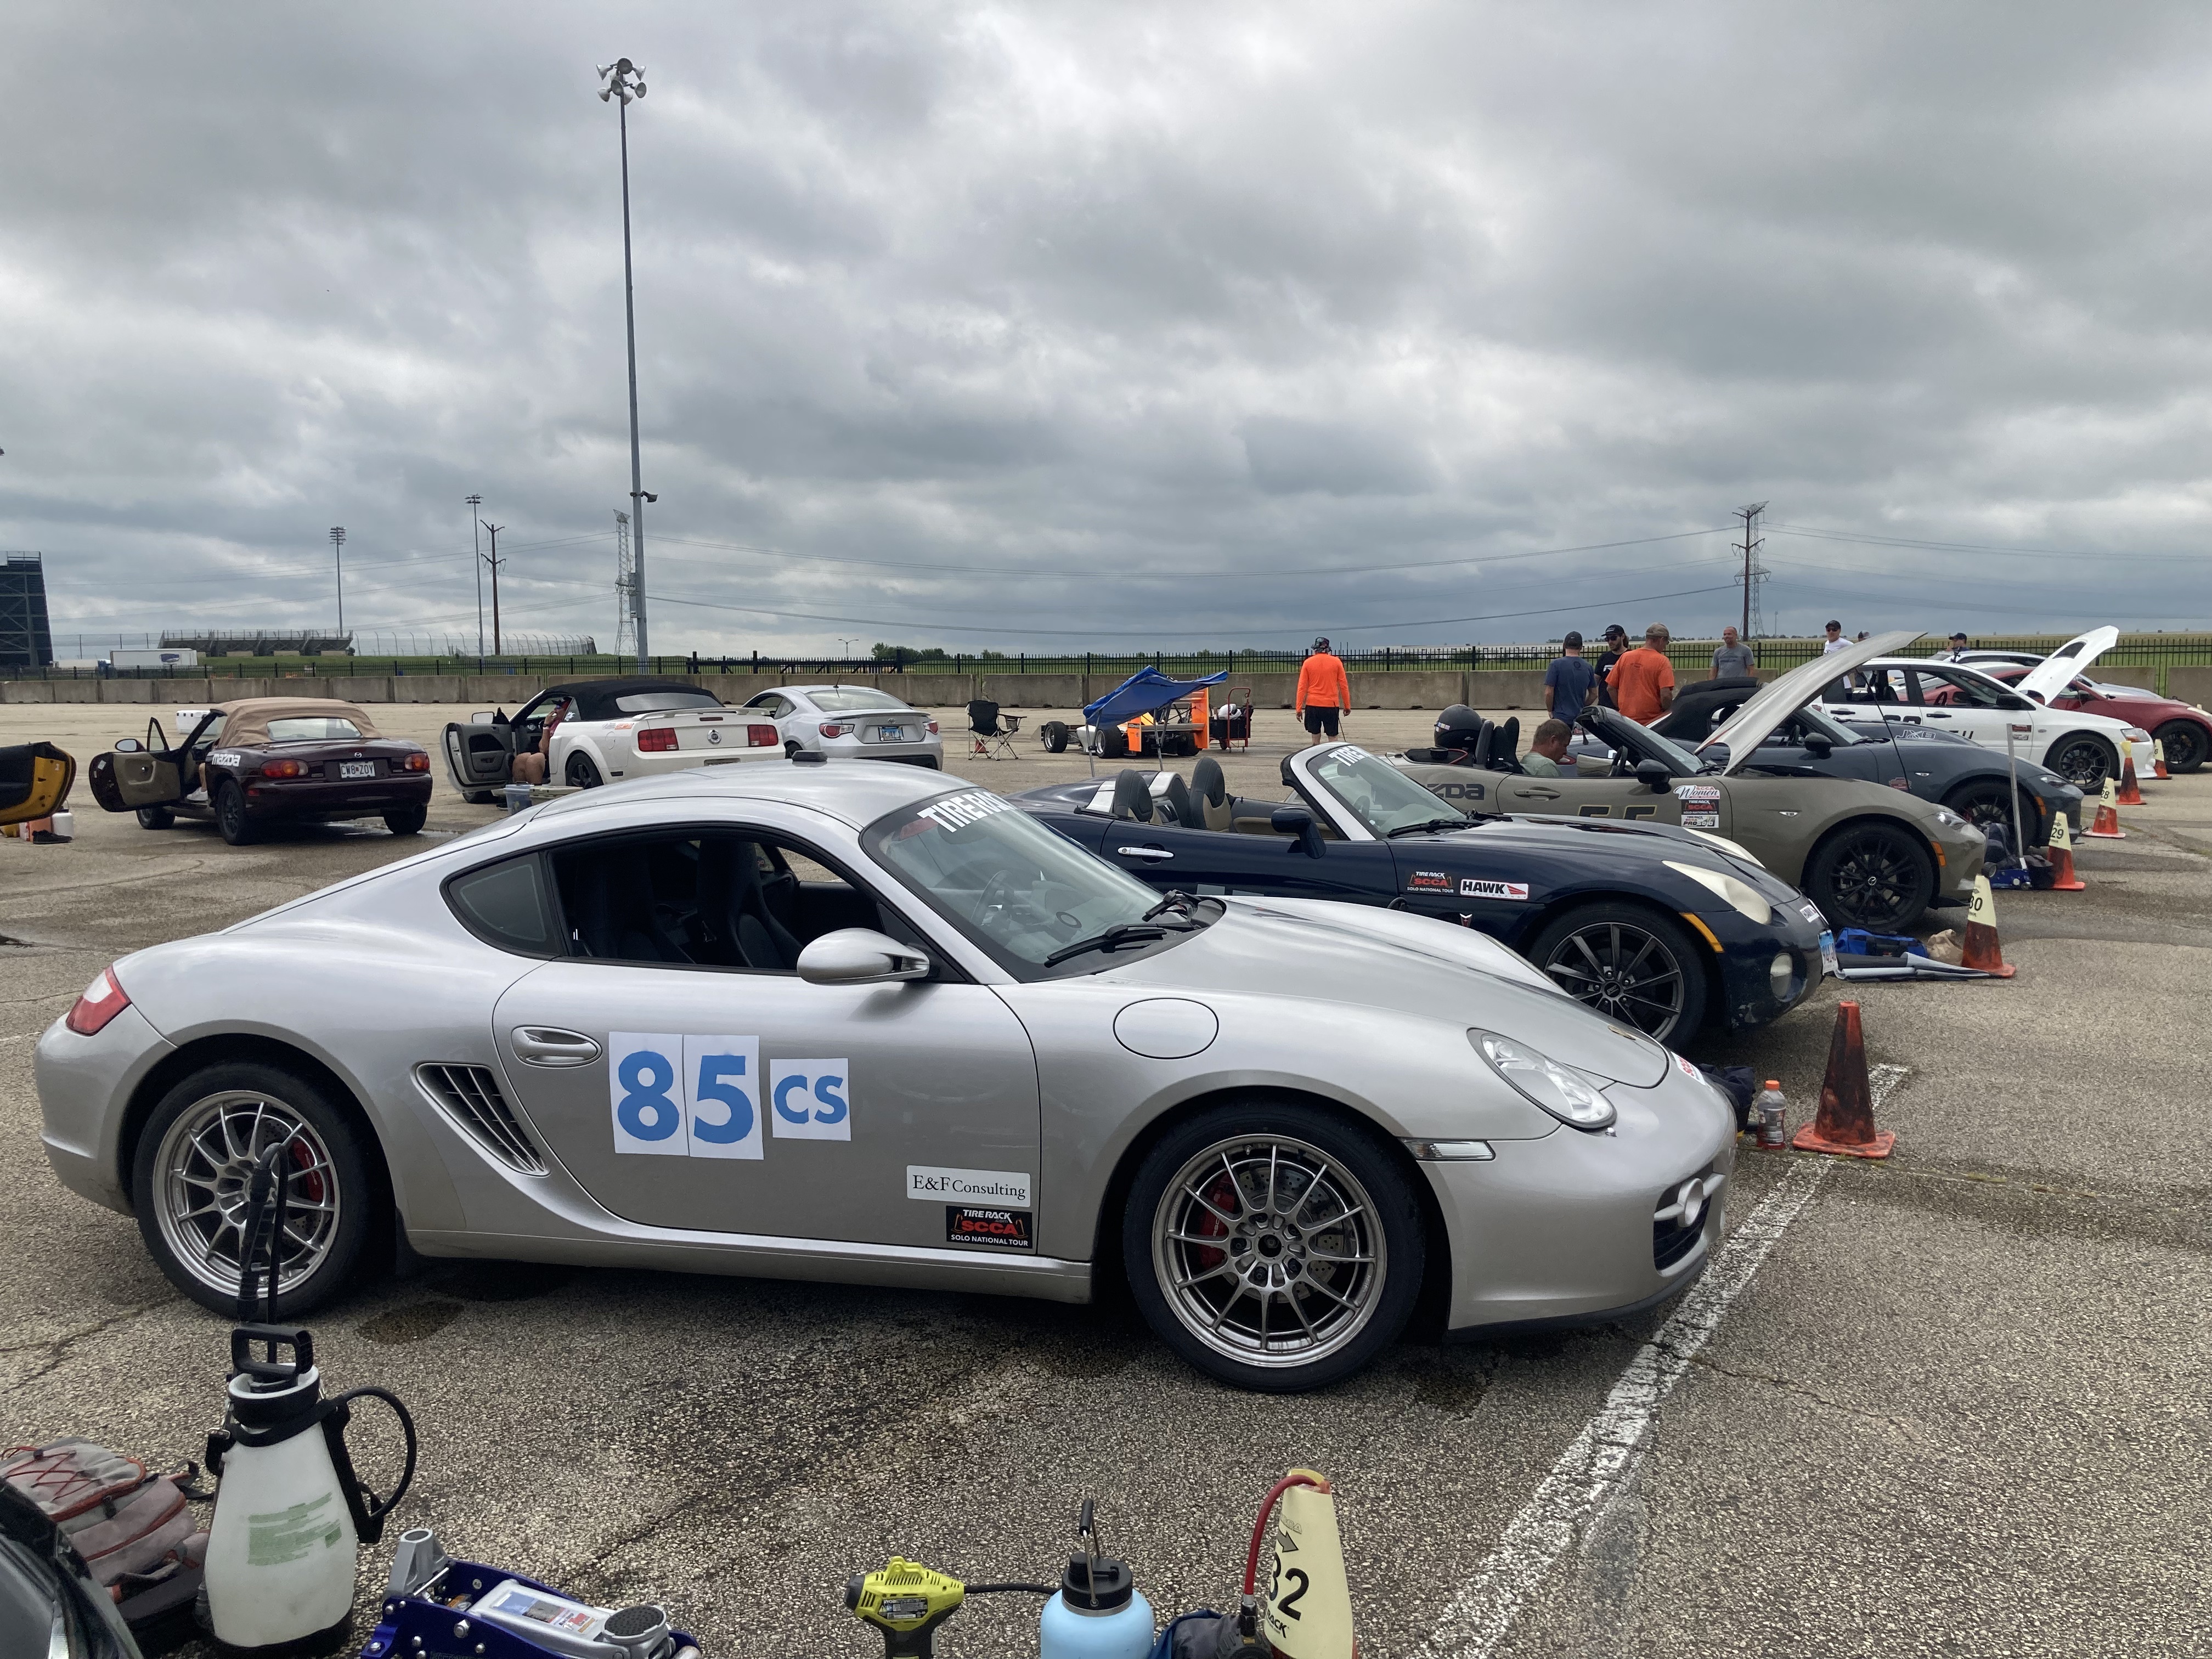
The next event I drove was Nats the first week of September. Here’s a pic of my co-driver and I:
Unfortunately, I was disappointed in my finish position of 27 out of 59, right about mid-pack and 11 spots out of the trophies. I easily found mistakes in my best runs that, if eliminated, would have put me close to the trophies, but not quite there.
Meanwhile, Will King, my nemesis at Grissom, ran fantastic and captured 9th.
The rest of the year my local performances were similarly disappointing. After paxing 6th, 7th and 8th overall (of ~110 drivers at each) in three earlier events before the Chicago and Grissom Tours I ended the year with four events where I averaged 15th pax. Something seemed to be off.
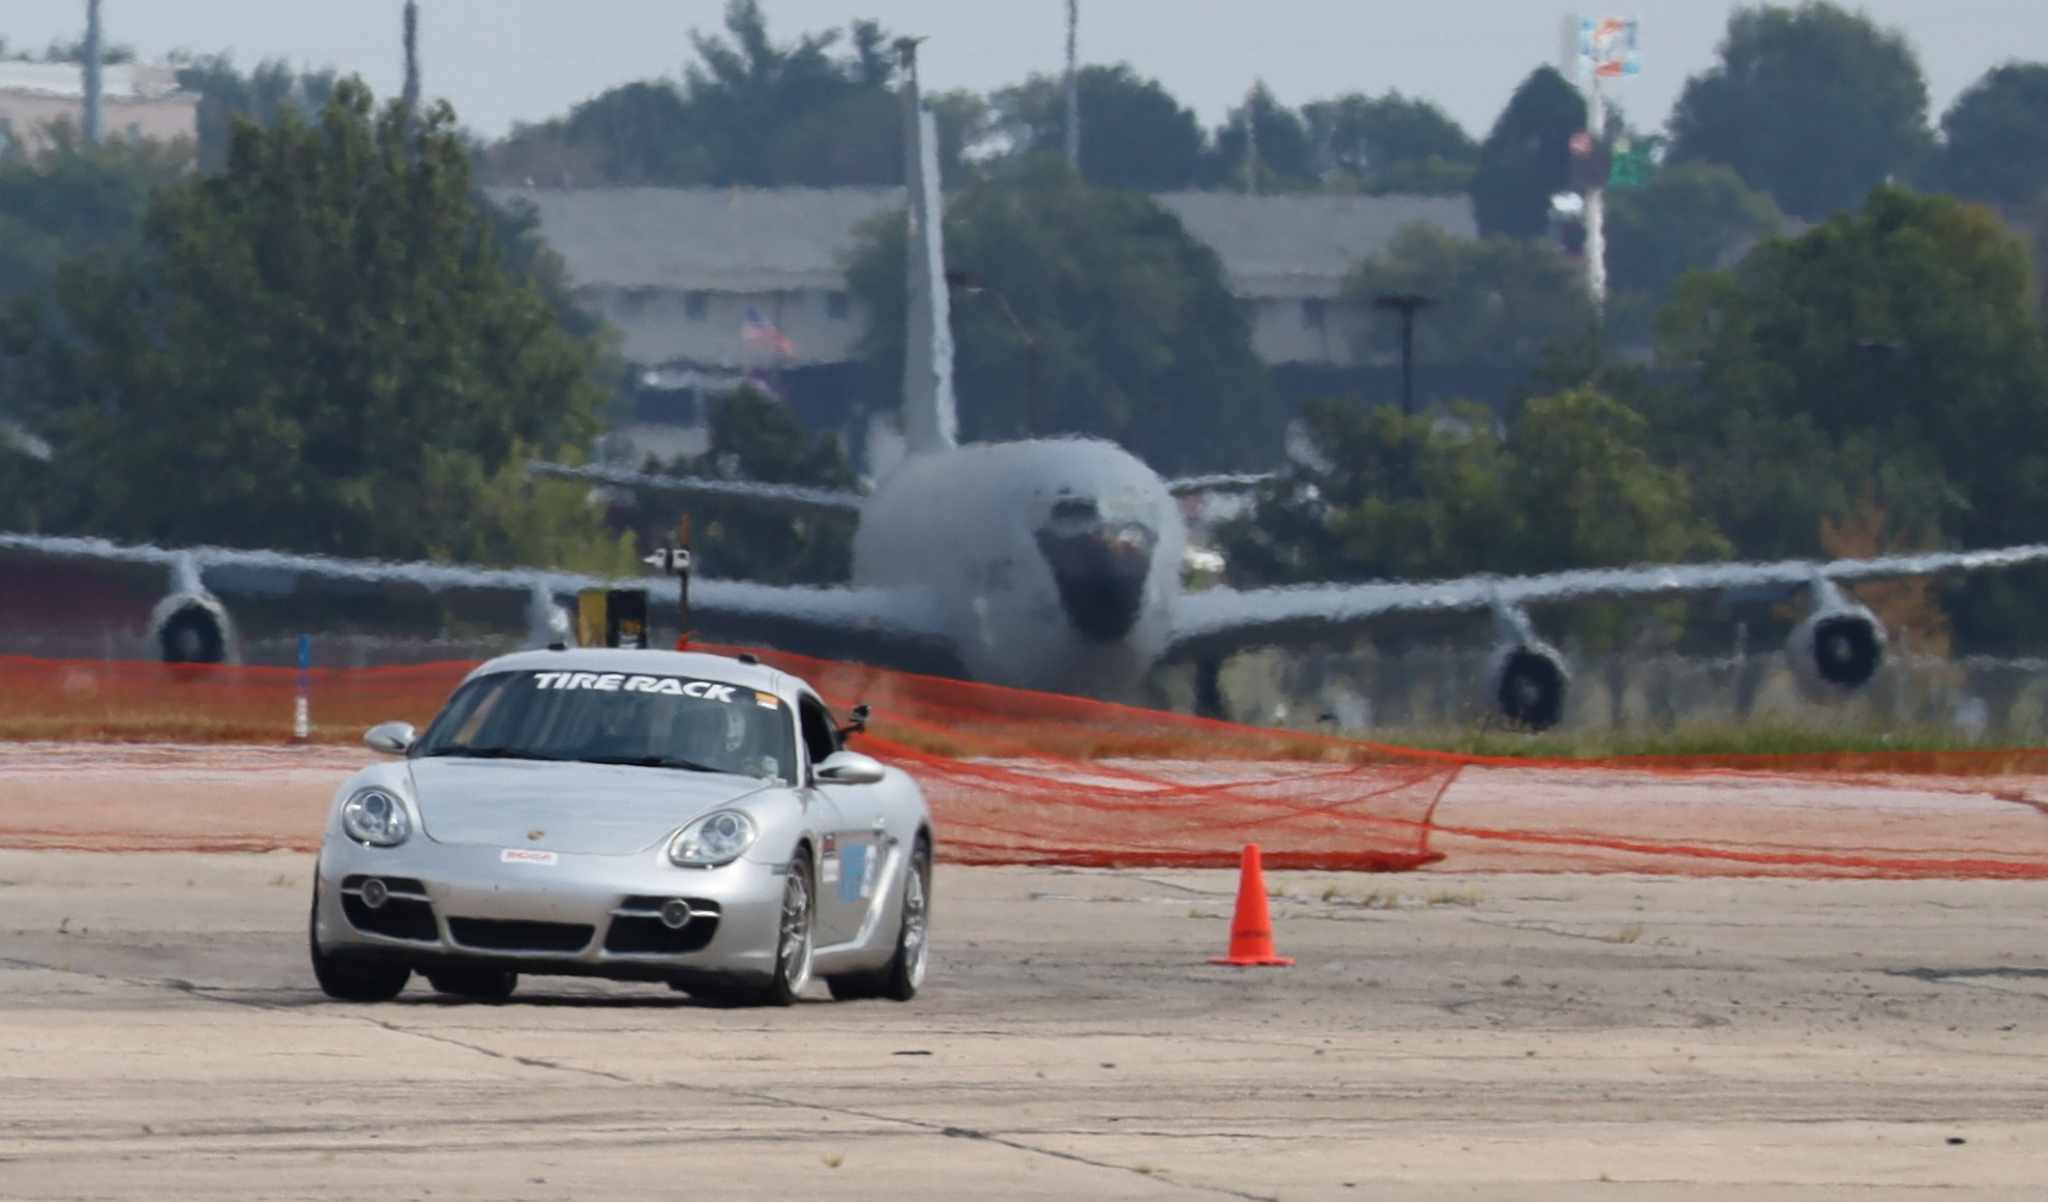
Then Stephen Fehr sent me this picture he had taken at Nats:
Though I’m not sure exactly where this is on the course, my initial reaction was that the car was rolling too much. I started thinking about going stiffer with the bumpstops.
After Nats I’d gotten the front B6 struts revalved to my spec, leaving the rears for later. I wanted to make sure my numbers worked. I immediately felt more front grip. Then, when I was ready to have the rears revalved my local guy was unable to accommodate due to health issues. Eventually I contacted Chuck Mathews in Iowa to do the job and disassembled the rear struts.
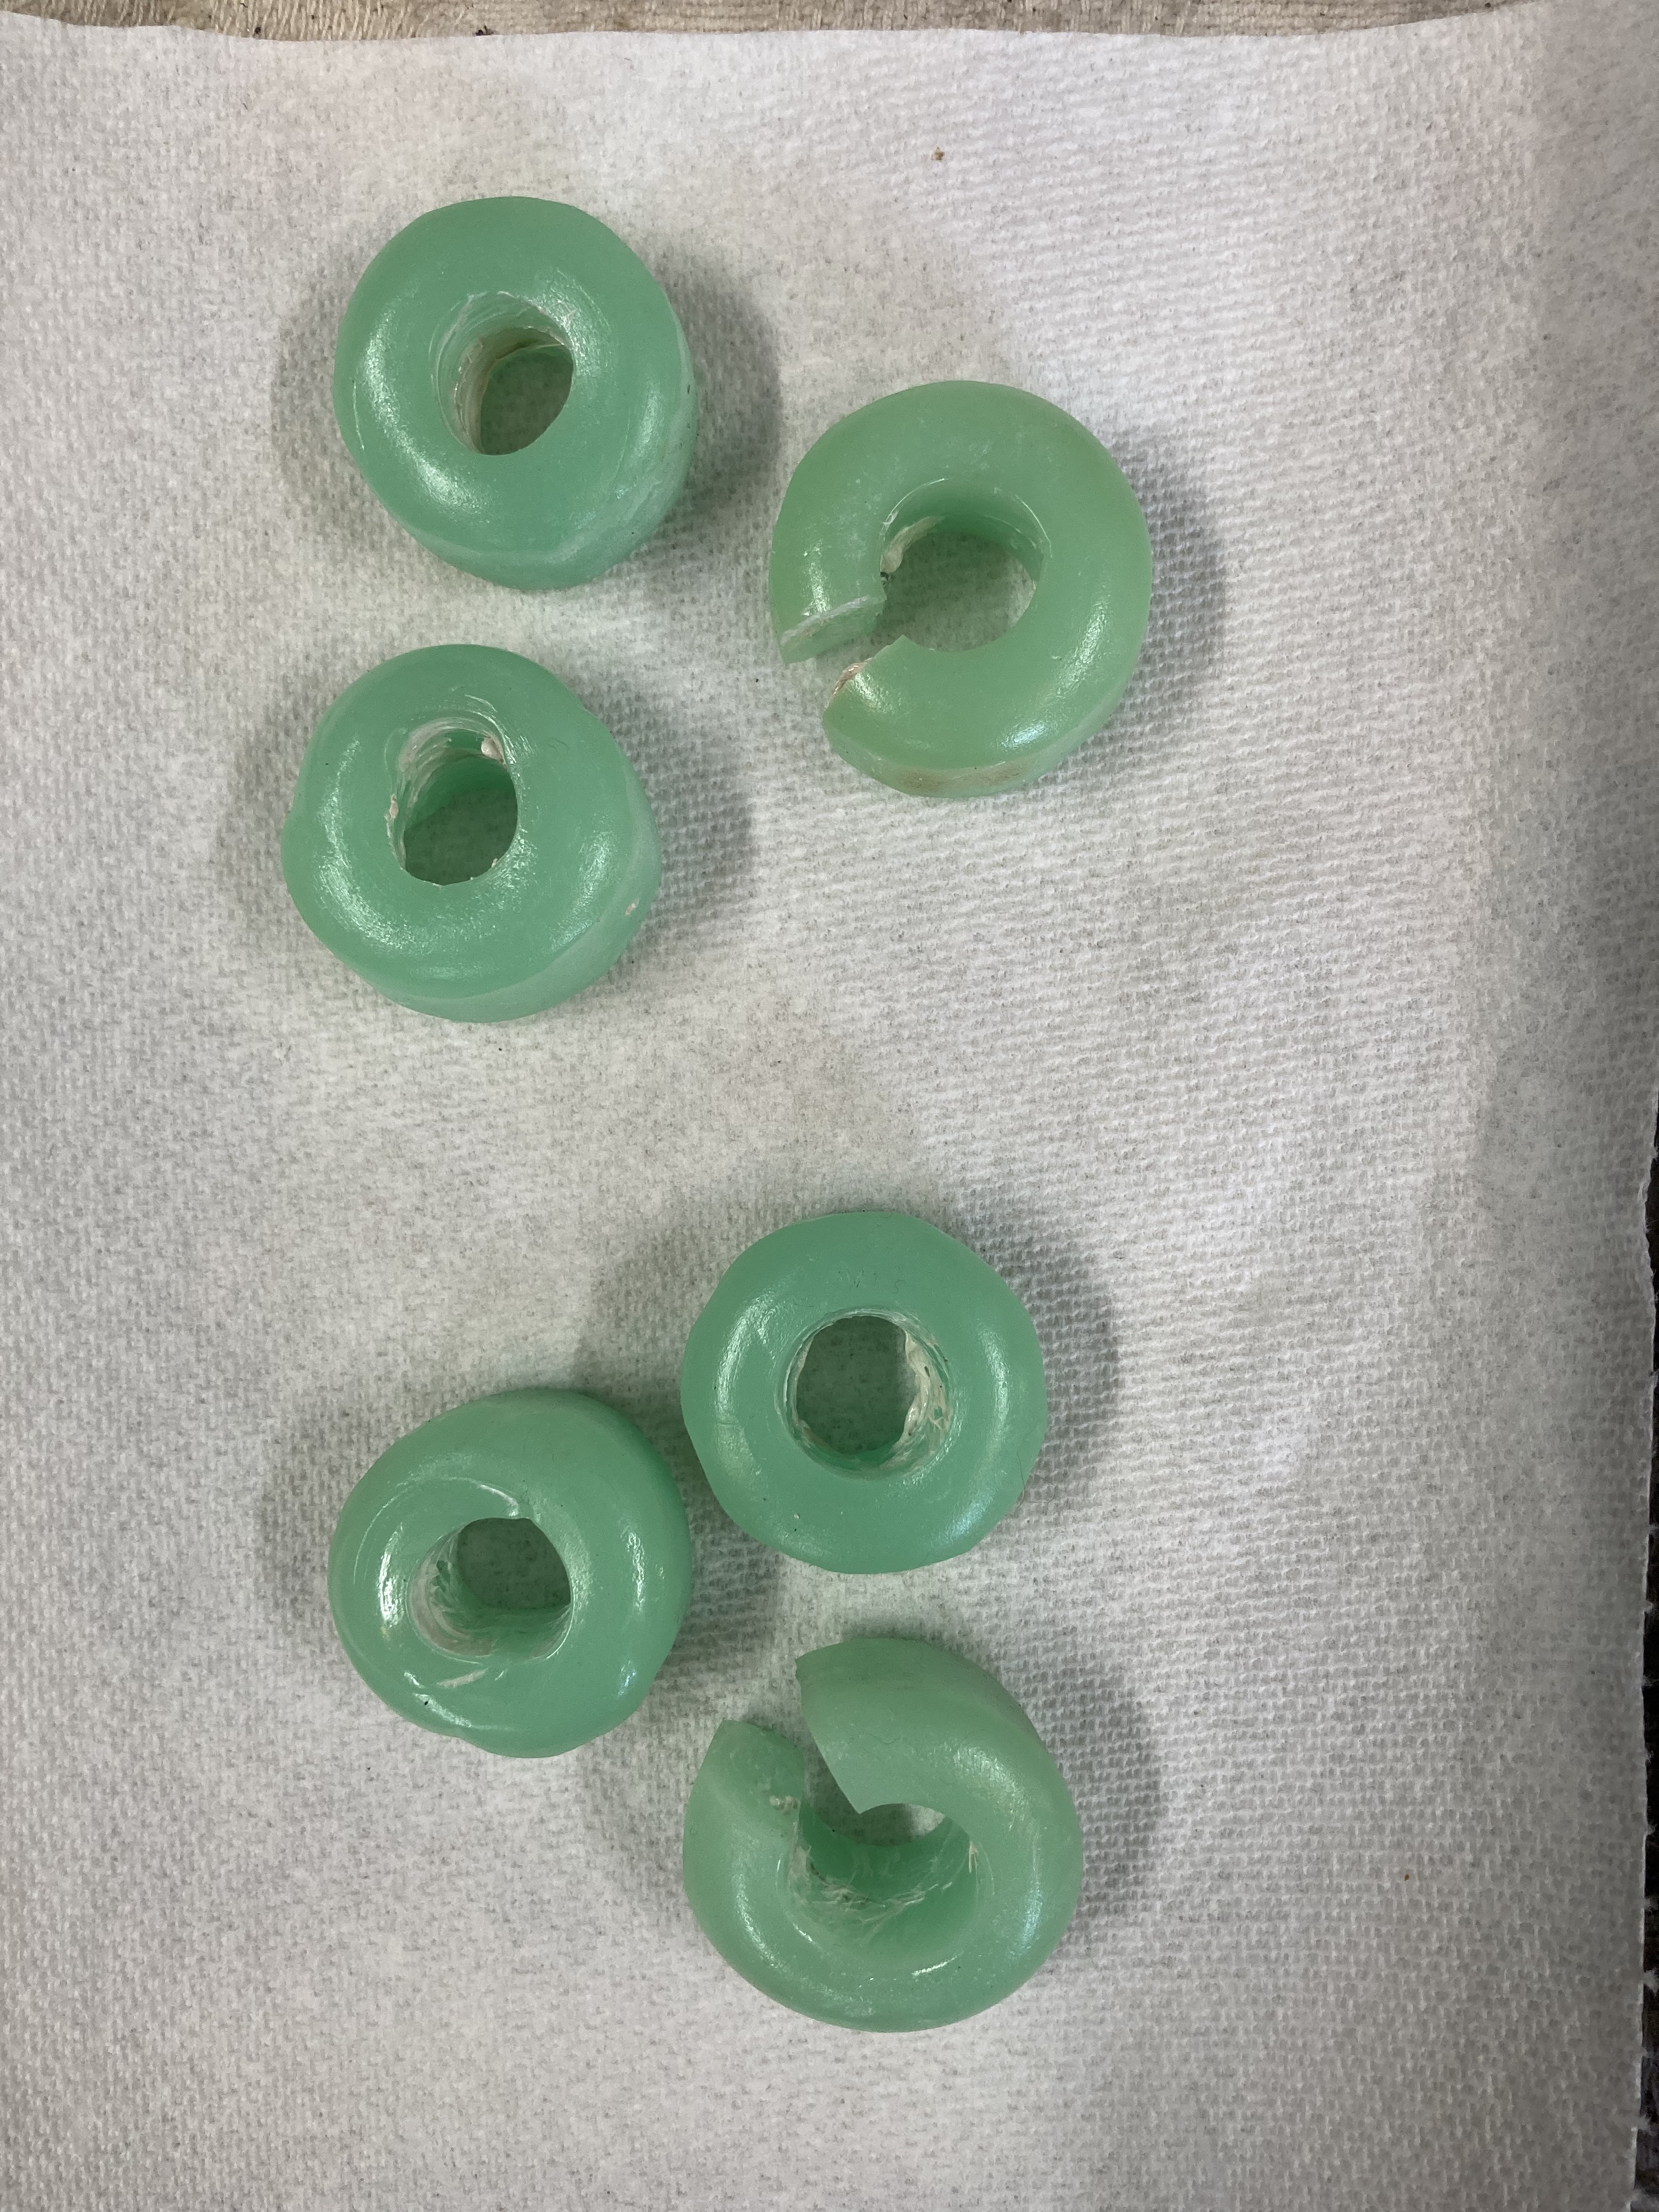
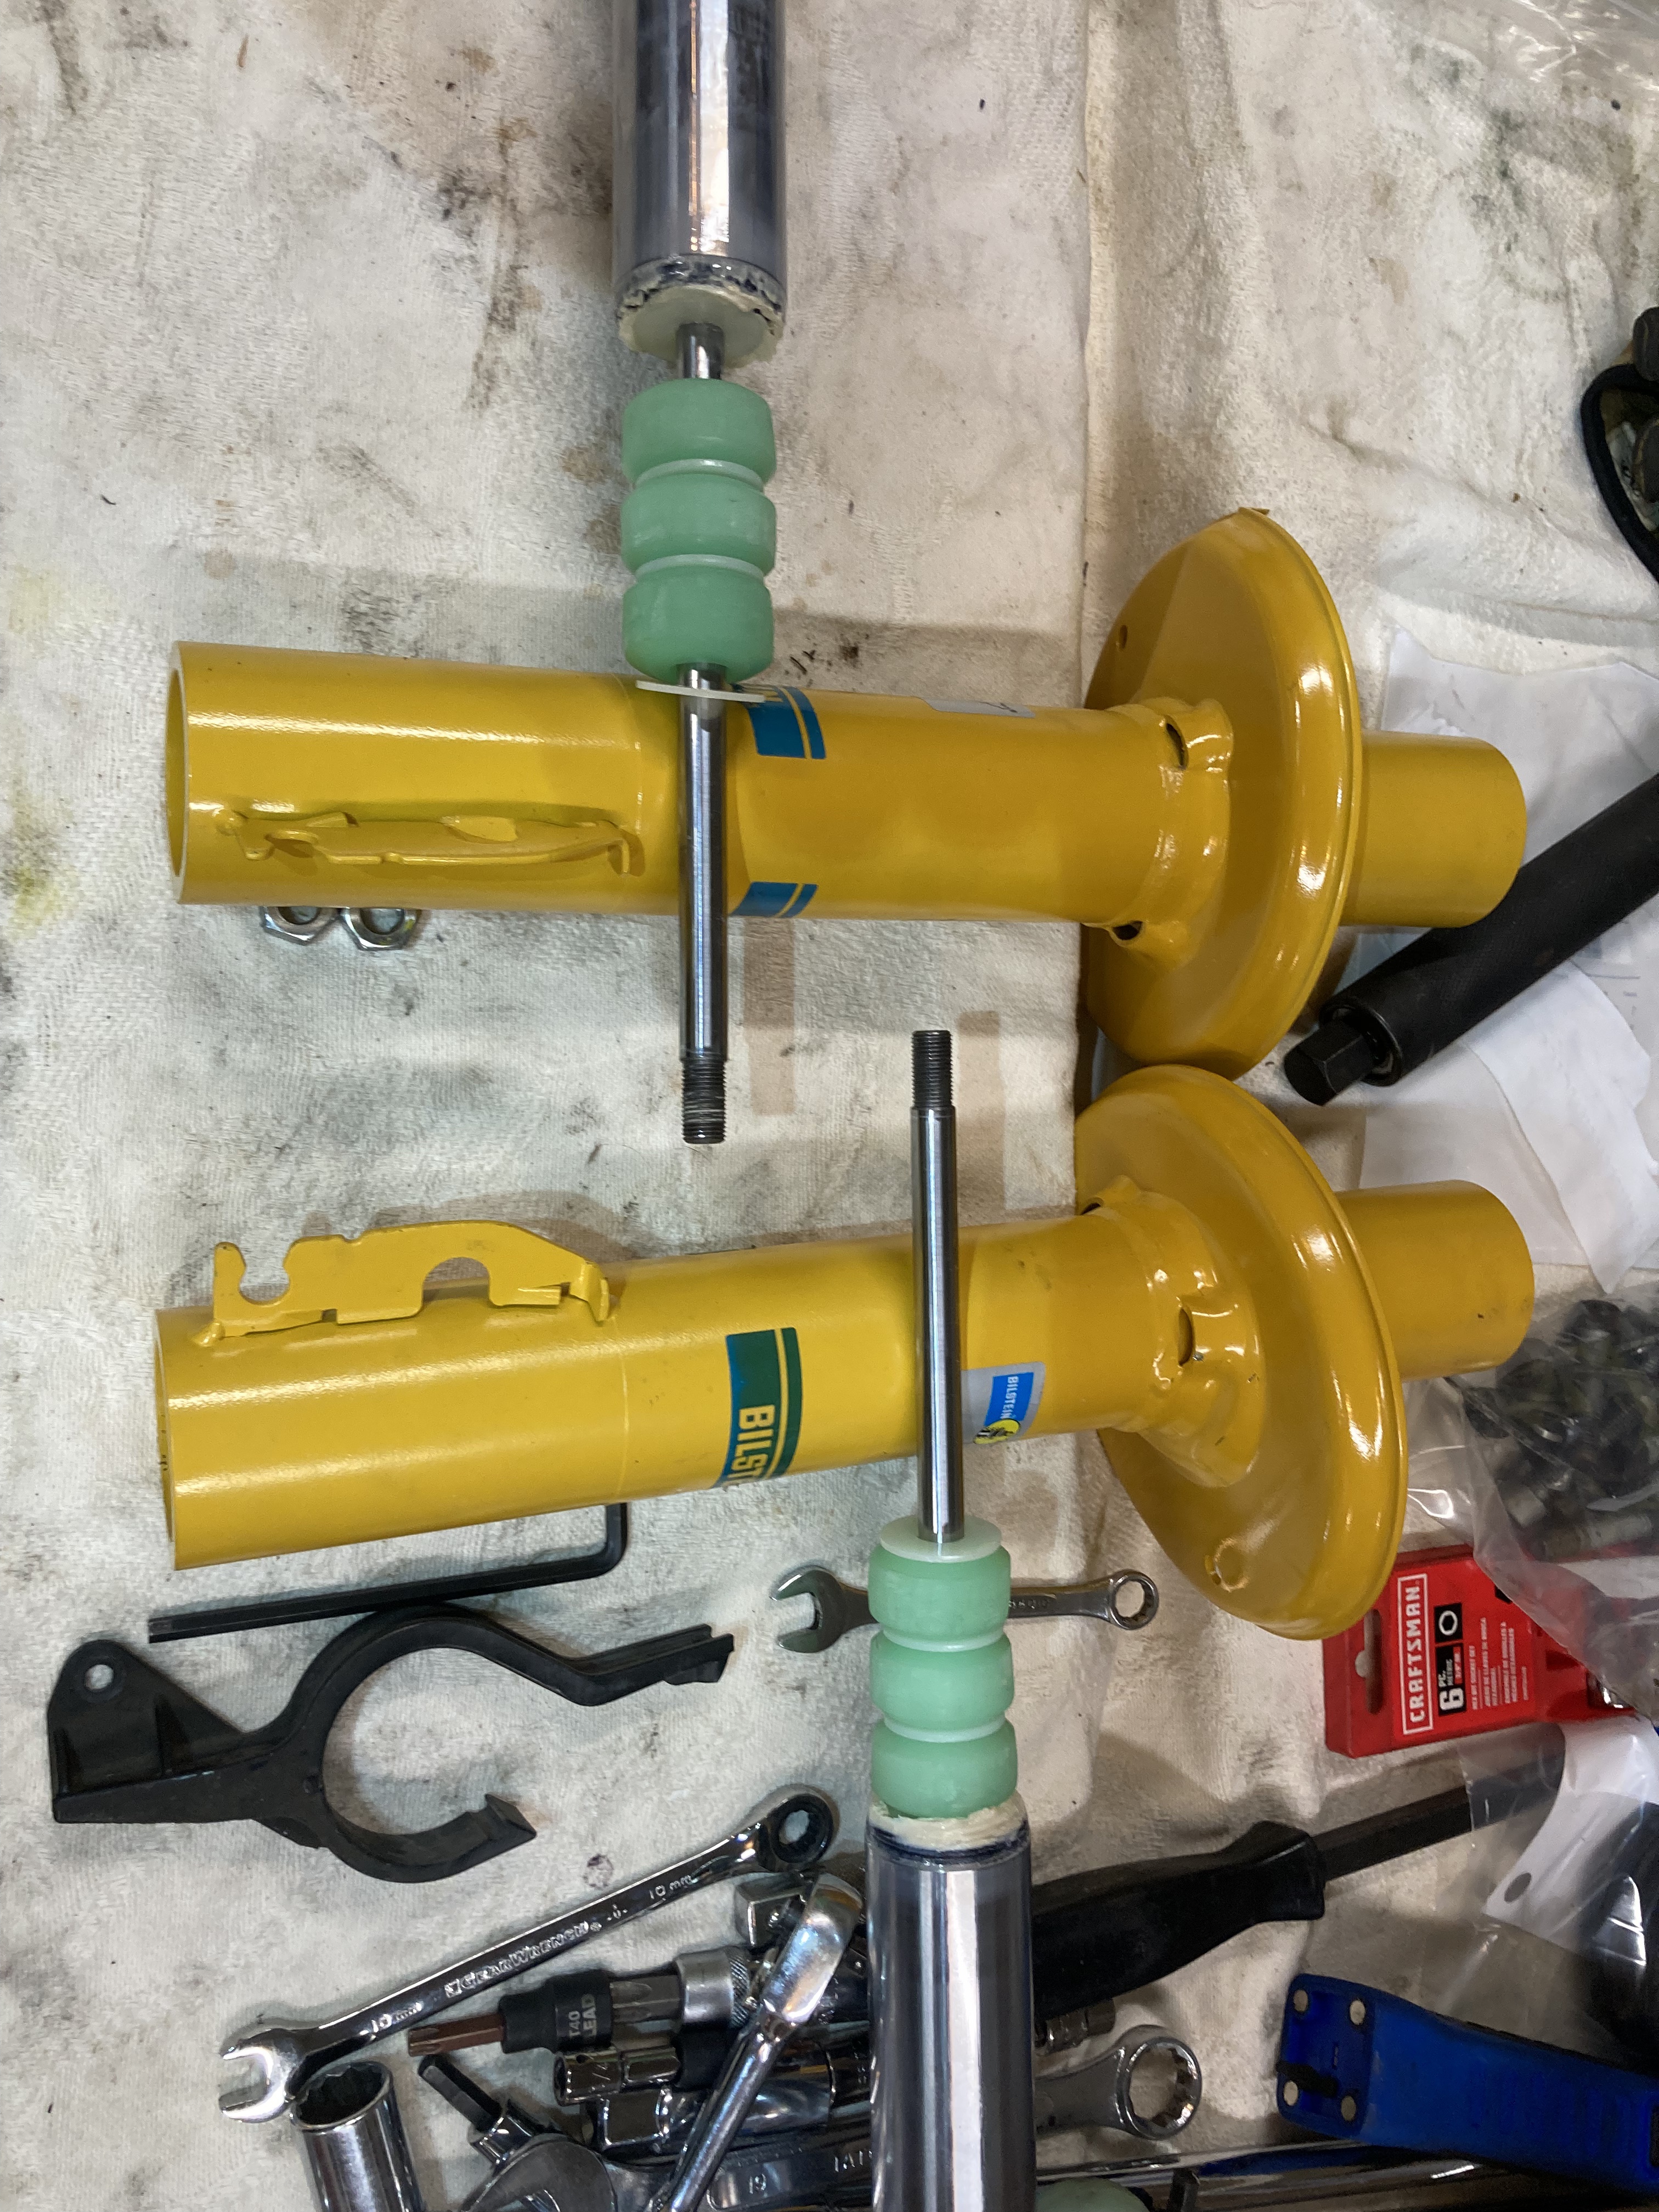
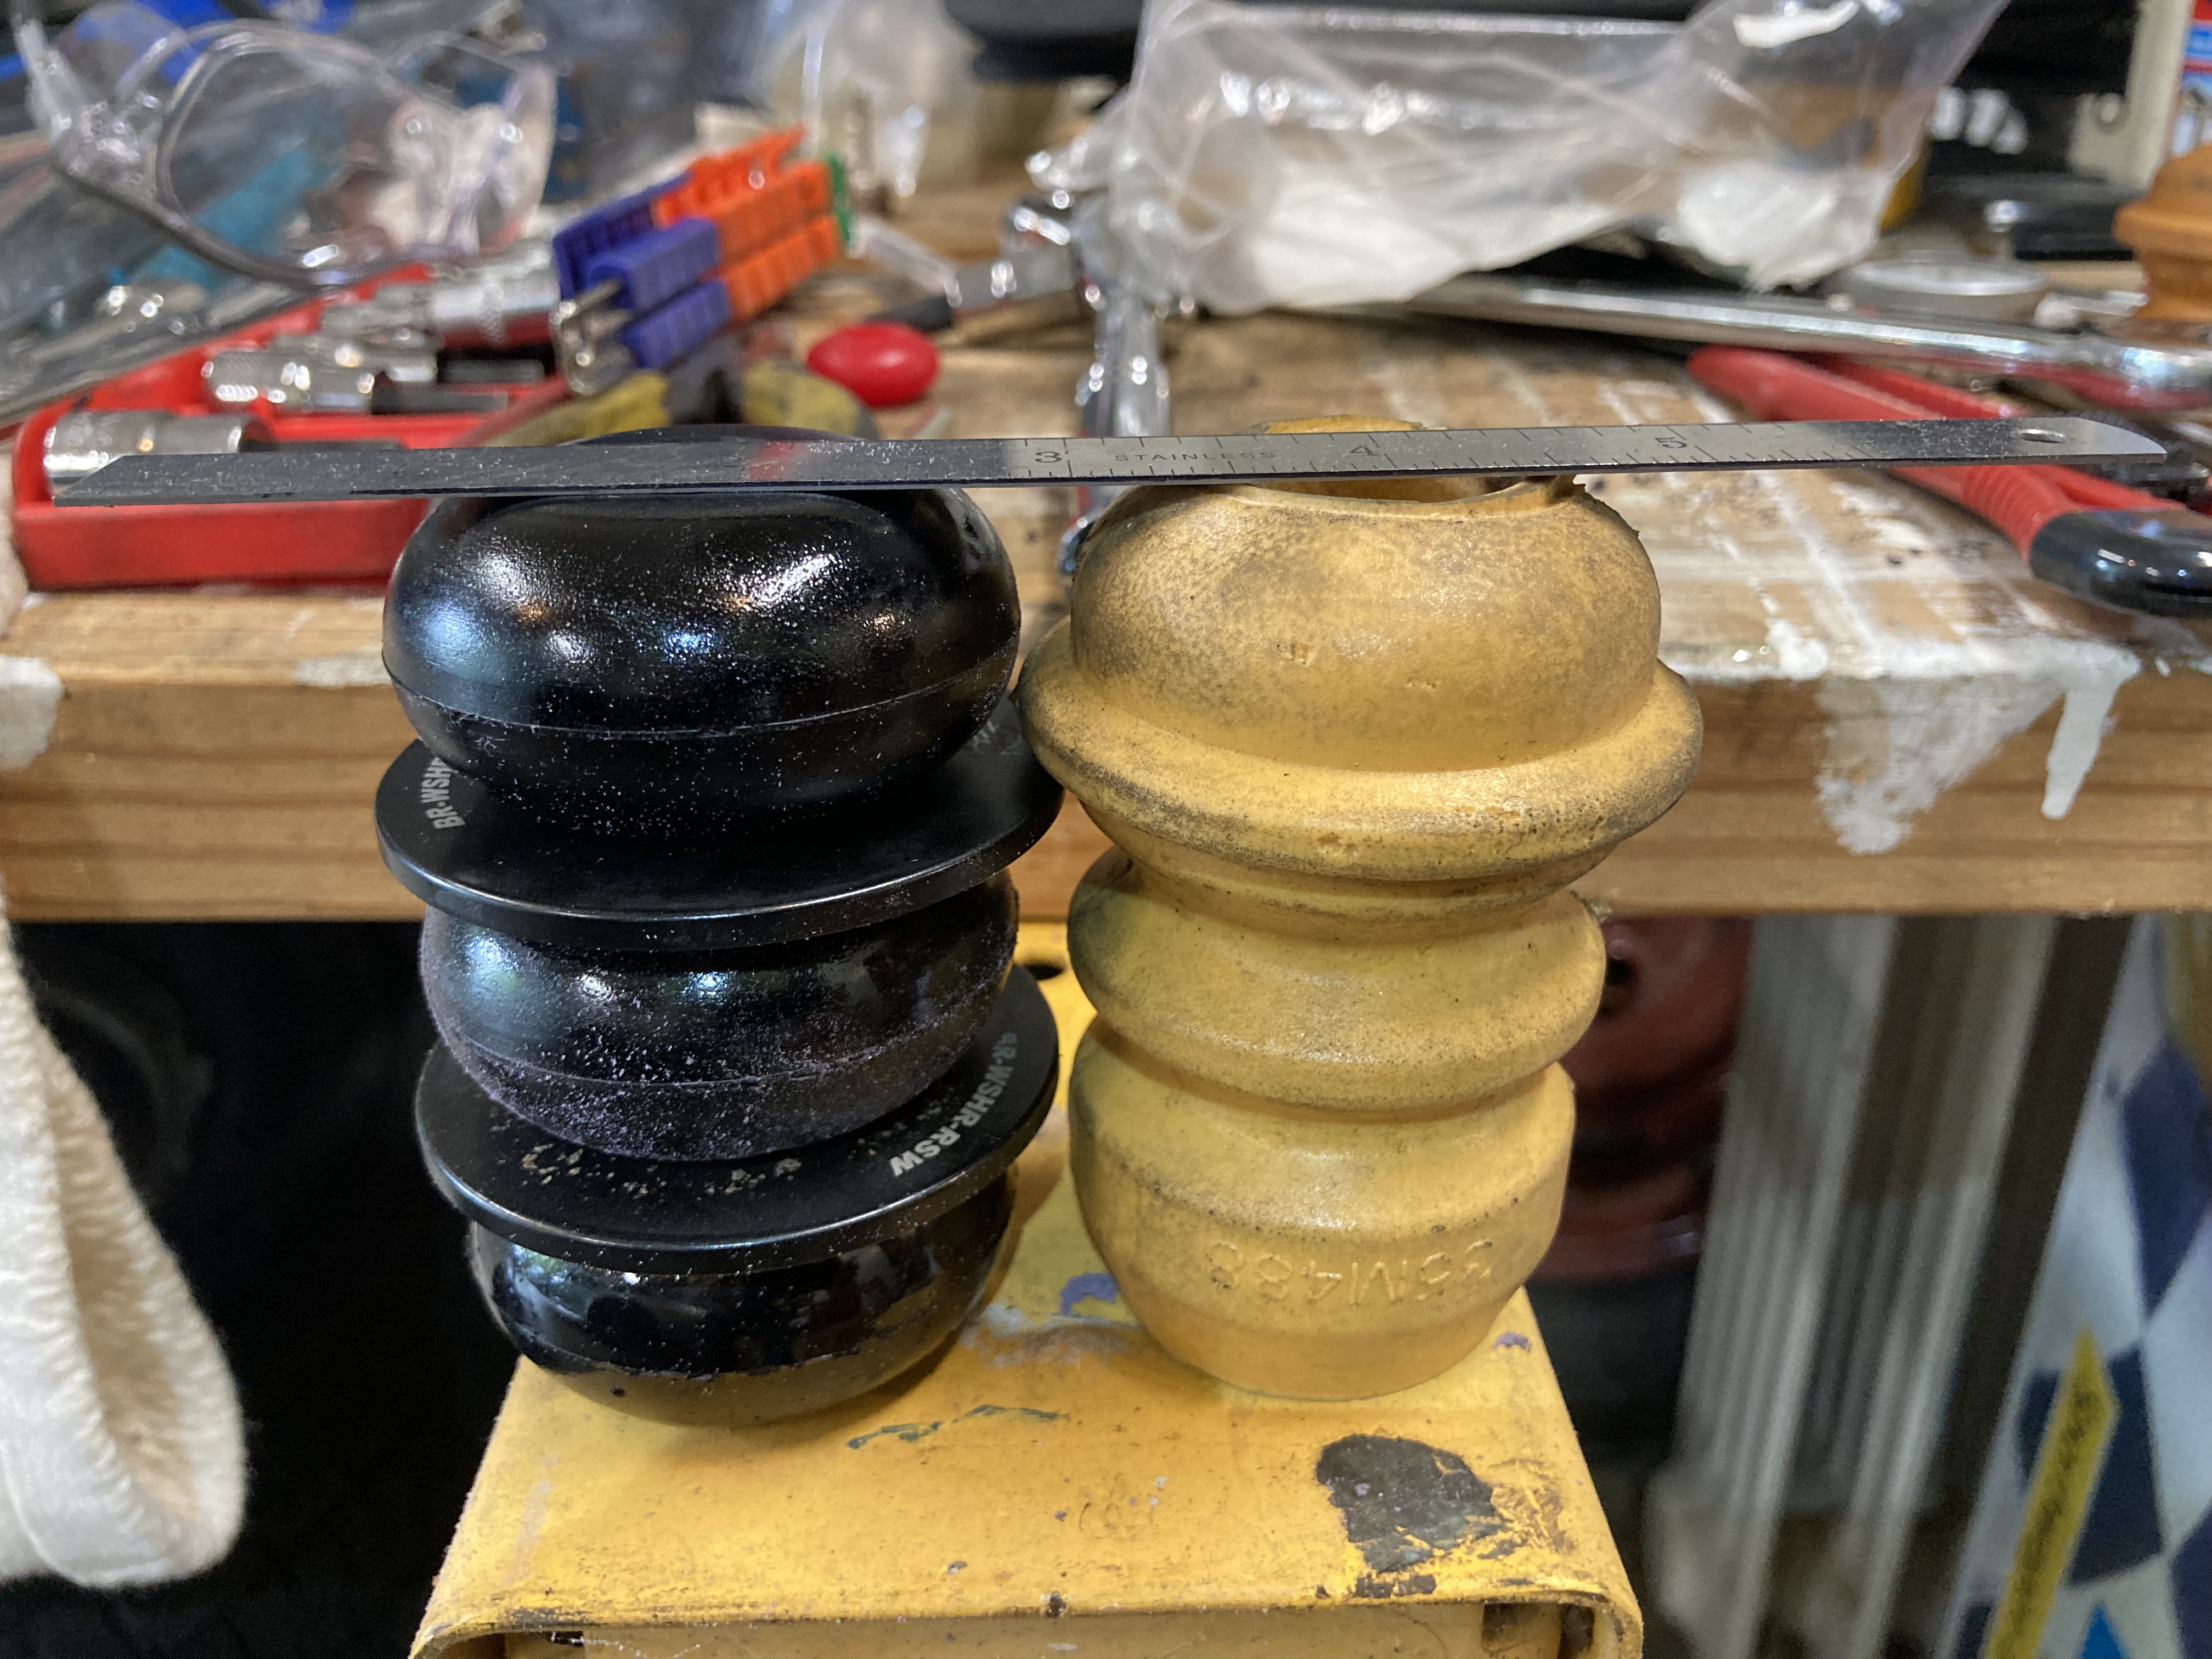
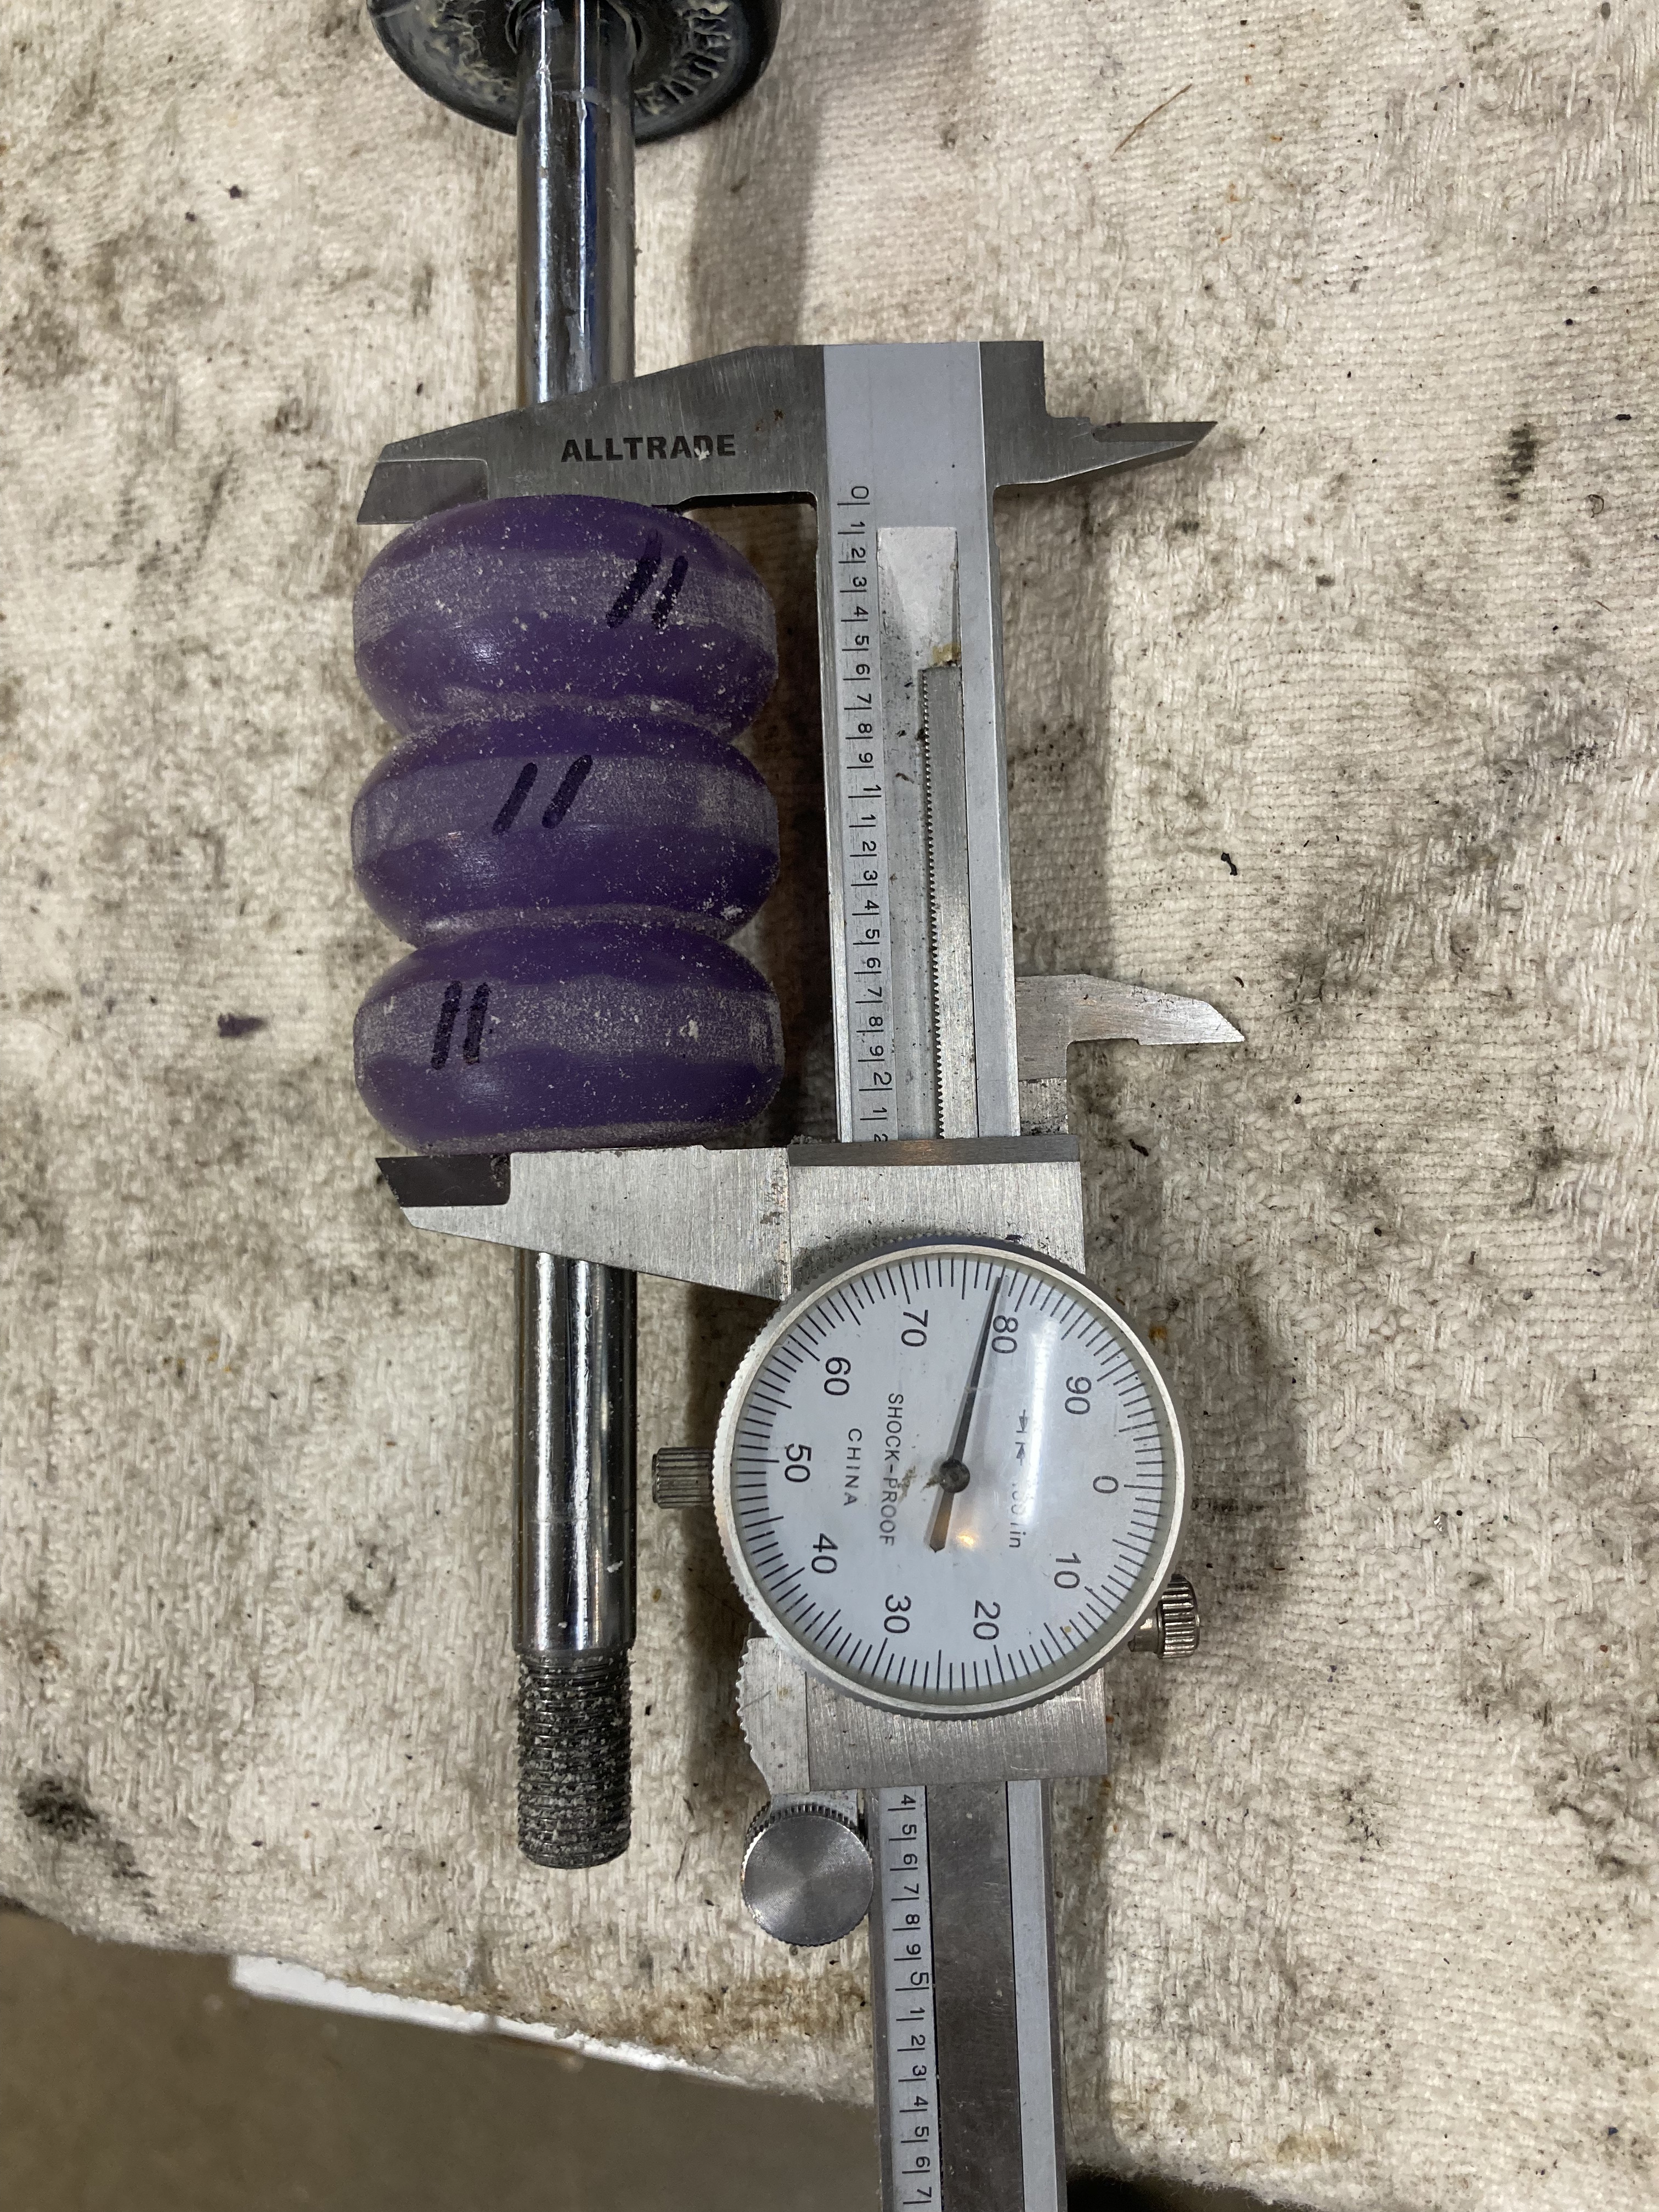
This is what I found:
The first donut on each side was torn and squished down in among the other two inside the tube of the inverted-design, Bilstein B6 struts. The other two from each side are also deformed, having been twisted on the shaft. Each of the plastic washers (not shown) that I’d put in between the donuts and at the top and bottom of the stack were also twisted or bent. Houston, we have a problem.
I took the front struts apart and found everything pristine inside both.
So, at some point, maybe the third run, Day 1 at Grissom, the rear bumpstop stacks had failed in a way that should have seriously compromised the balance of the car and also allow more roll than before. This is clear if you realize that the bumpstop stacks are approximately two times as stiff as the steel springs. Or, at least they are when working correctly.
I think I know why it happened and how to fix it. While Chuck is revalving the rears I’m re-creating both front and rear bumpstop stacks to be stable and even some stiffer. I’m looking forward to the start of the season!
Nothing on the course can be a surprise. You must know the course from walking it beforehand and from looking far ahead while driving it so you can place the car on your planned line at every moment. (Always have a plan!) This eliminates timidity, promotes making inputs on time and allows you to drive hard each foot of the way.
-You test all the key parameters
The most common question novices ask is, “What tire pressure should I be running?” The true answer is that nobody can tell you what tire pressures to use for your particular model, tire-type, set-up, condition (How old are your shocks? What condition are your bushings?) or driving style. You must know what tire pressures, alignment settings and any other adjustable setup parameters give your car the best balance of grip, response and handling. There is only one way to learn these things: TEST.
So, always be happily testing and observing. Not all parameters can be changed during an event, so testing has to continue during the year as you make some changes between events.
-You constantly check for the limits of grip during each run
Become confident with regularly exceeding the limits of grip. There’s grip after slip. This includes when accelerating, cornering and braking. You can’t know where the limit is without going over it and it’s not the same as it was an hour ago, much less last week. If you fear going over the limit because you know that the car will uncontrollably spin or slide, then something is wrong with the car and you need to fix it. No modern car comes from the factory with evil handling. If your’s does weird things then something is wrong or someone has messed it up.
The limit is sometimes different from one corner to the next. The limit always changes within a single run in any case as tire surface temperatures rapidly change. You only learn how to smoothly drive at the limit by consistently pushing over the limit. Eventually, driving slightly out of control becomes as natural as walking through a doorway without crashing into either side. Note: you can only do this at autocross. Do this as a novice at a race track and you’re unlikely to last the day.
-You learn to collect and analyze data
The purpose of testing is to collect data, whether that data is how something feels, whether and when the car oversteers or understeers and how much, or is derived from electronic sensors. Once you begin collecting electronic run data you must learn to analyze it. Data analysis is a big field, but the basics are not difficult to learn. Data is the main reason why today’s autocrossers are faster than drivers 30 years ago and can often get fast, faster. Even within a 50s run there are multiple opportunities to save and lose time. That’s why the total elapsed run time is an almost worthless piece of data. If it’s the least bit unclear how to drive a feature then drive it different ways on purpose and compare the data. Don’t count on your own inability to drive a feature the same way twice to tell you much. Random data often leads to invalid conclusions.
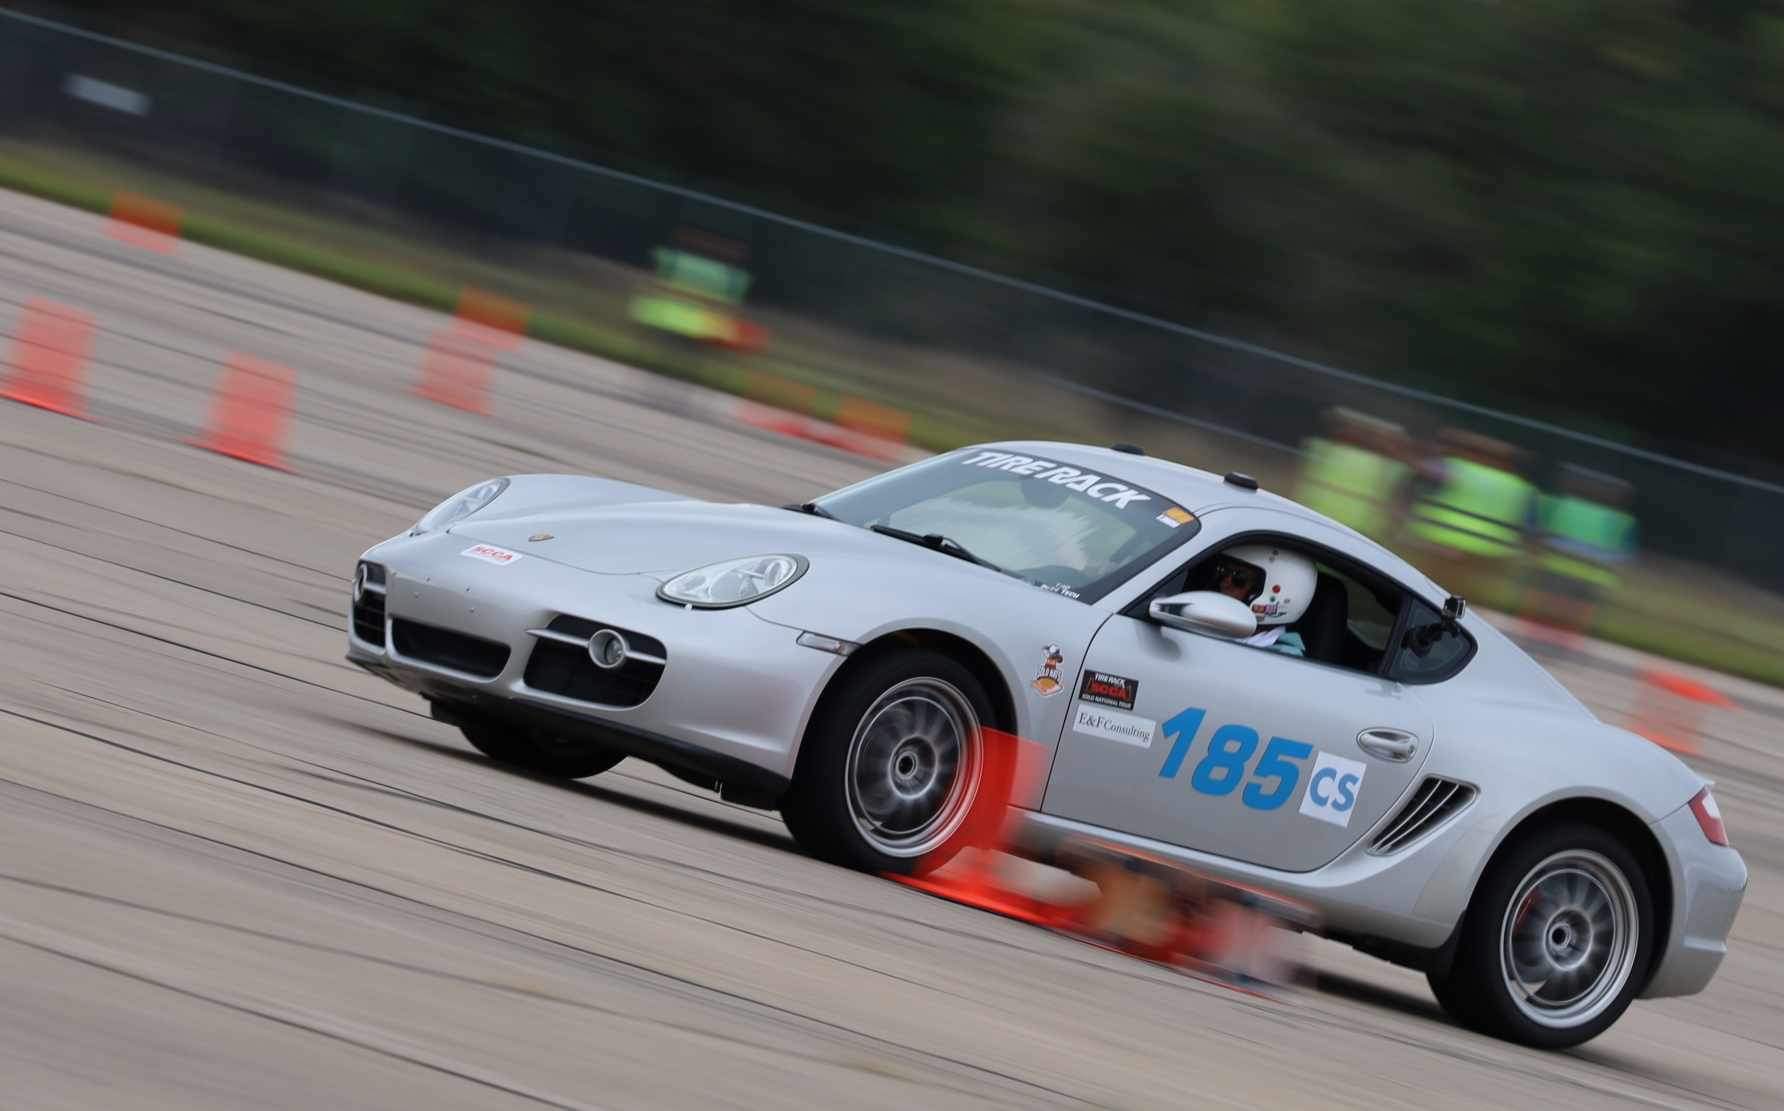
After several regional events the Cayman’s first two national events were the Bristol Pro followed by the Bristol Tour. The situation with the car was this: stock struts equipped with high-rate bumpstops plus the Tarret 26.8mm 5-hole front bar set to the middle set of holes. Negative camber is maxed out all around (about 1 degree in the front and 1.5 or so in the rear), front toe is zero and the rear is toed in a total of 1/8″. Bridgestone RE71RS tires in 18 by 255/285.
The only non-ND In CS At Bristol Motor Speedway–
Below is what the front bumpstop stack looked like. With the spacers and some slight trimming the stack is exactly the same height as the stock bumpstop. I estimate the stock bumpstop at 75lb/in. The stack of three blacks provide 350lb/in.
Comparison Between Stock and Engineered Front Bumpstops
Notice the shape of the black polyurethane donuts. They begin with limited surface area in contact, but as they compress the surface area rapidly increases. I think this provides an initially soft rate and explains why I never feel the point of contact.
In any case the setup didn’t work well at all on that bumpy site. While it was well balanced with moderate oversteer, in places the car was bouncing like a bucking bronco. I placed 25th out of 31. The only good news was that I made significant progress in learning how to launch the car: use a very high rpm clutch dump.
The Bristol Tour was only slightly better. I was 24th of 34. I managed to beat a few people that had beaten me in the Pro, but it was small consolation. I also lost badly to someone I had beaten the week before at a super-smooth site. The good news is that the car ran perfectly, nothing broke and it was clear where the major problem lay: insufficient low-shaft-speed damping.
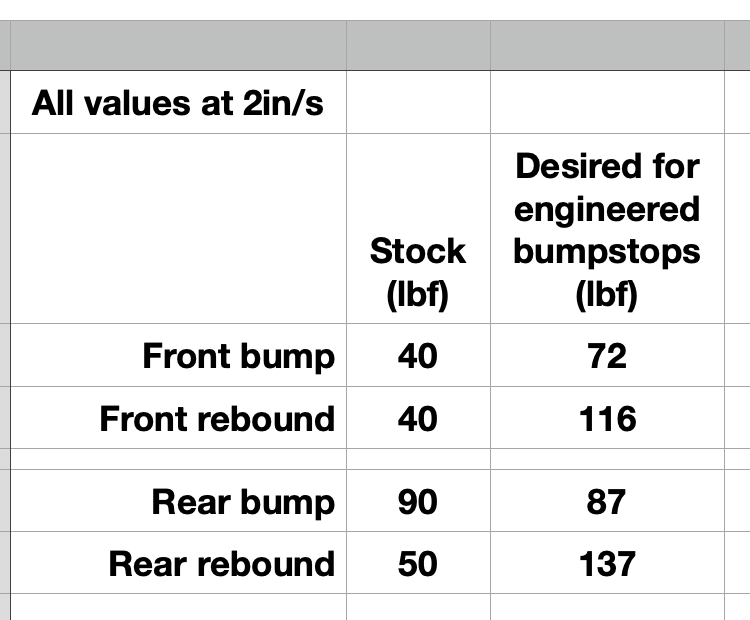
Below is a comparison of forces provided by the stock struts at 2in/s shaft velocity to what I think is needed. Except for rear bump the stock values are insufficient to control the sprung mass. This is to be expected since the bumpstops massively increase the effective spring rate. By the way, the “desired” values take into account the resilience of the polyurethane when calculating rebound forces, that is, the fact that the bumpstops have significant internal damping and return at most 65% of the applied energy. If I didn’t take this into account I would end up with too much rebound force once I install revalved B6 struts.
Comparison of Stock vs Desired Bump and Rebound Forces
After Bristol I was able to install the Bilstein B6 struts, but with the damping provided by Bilstein.
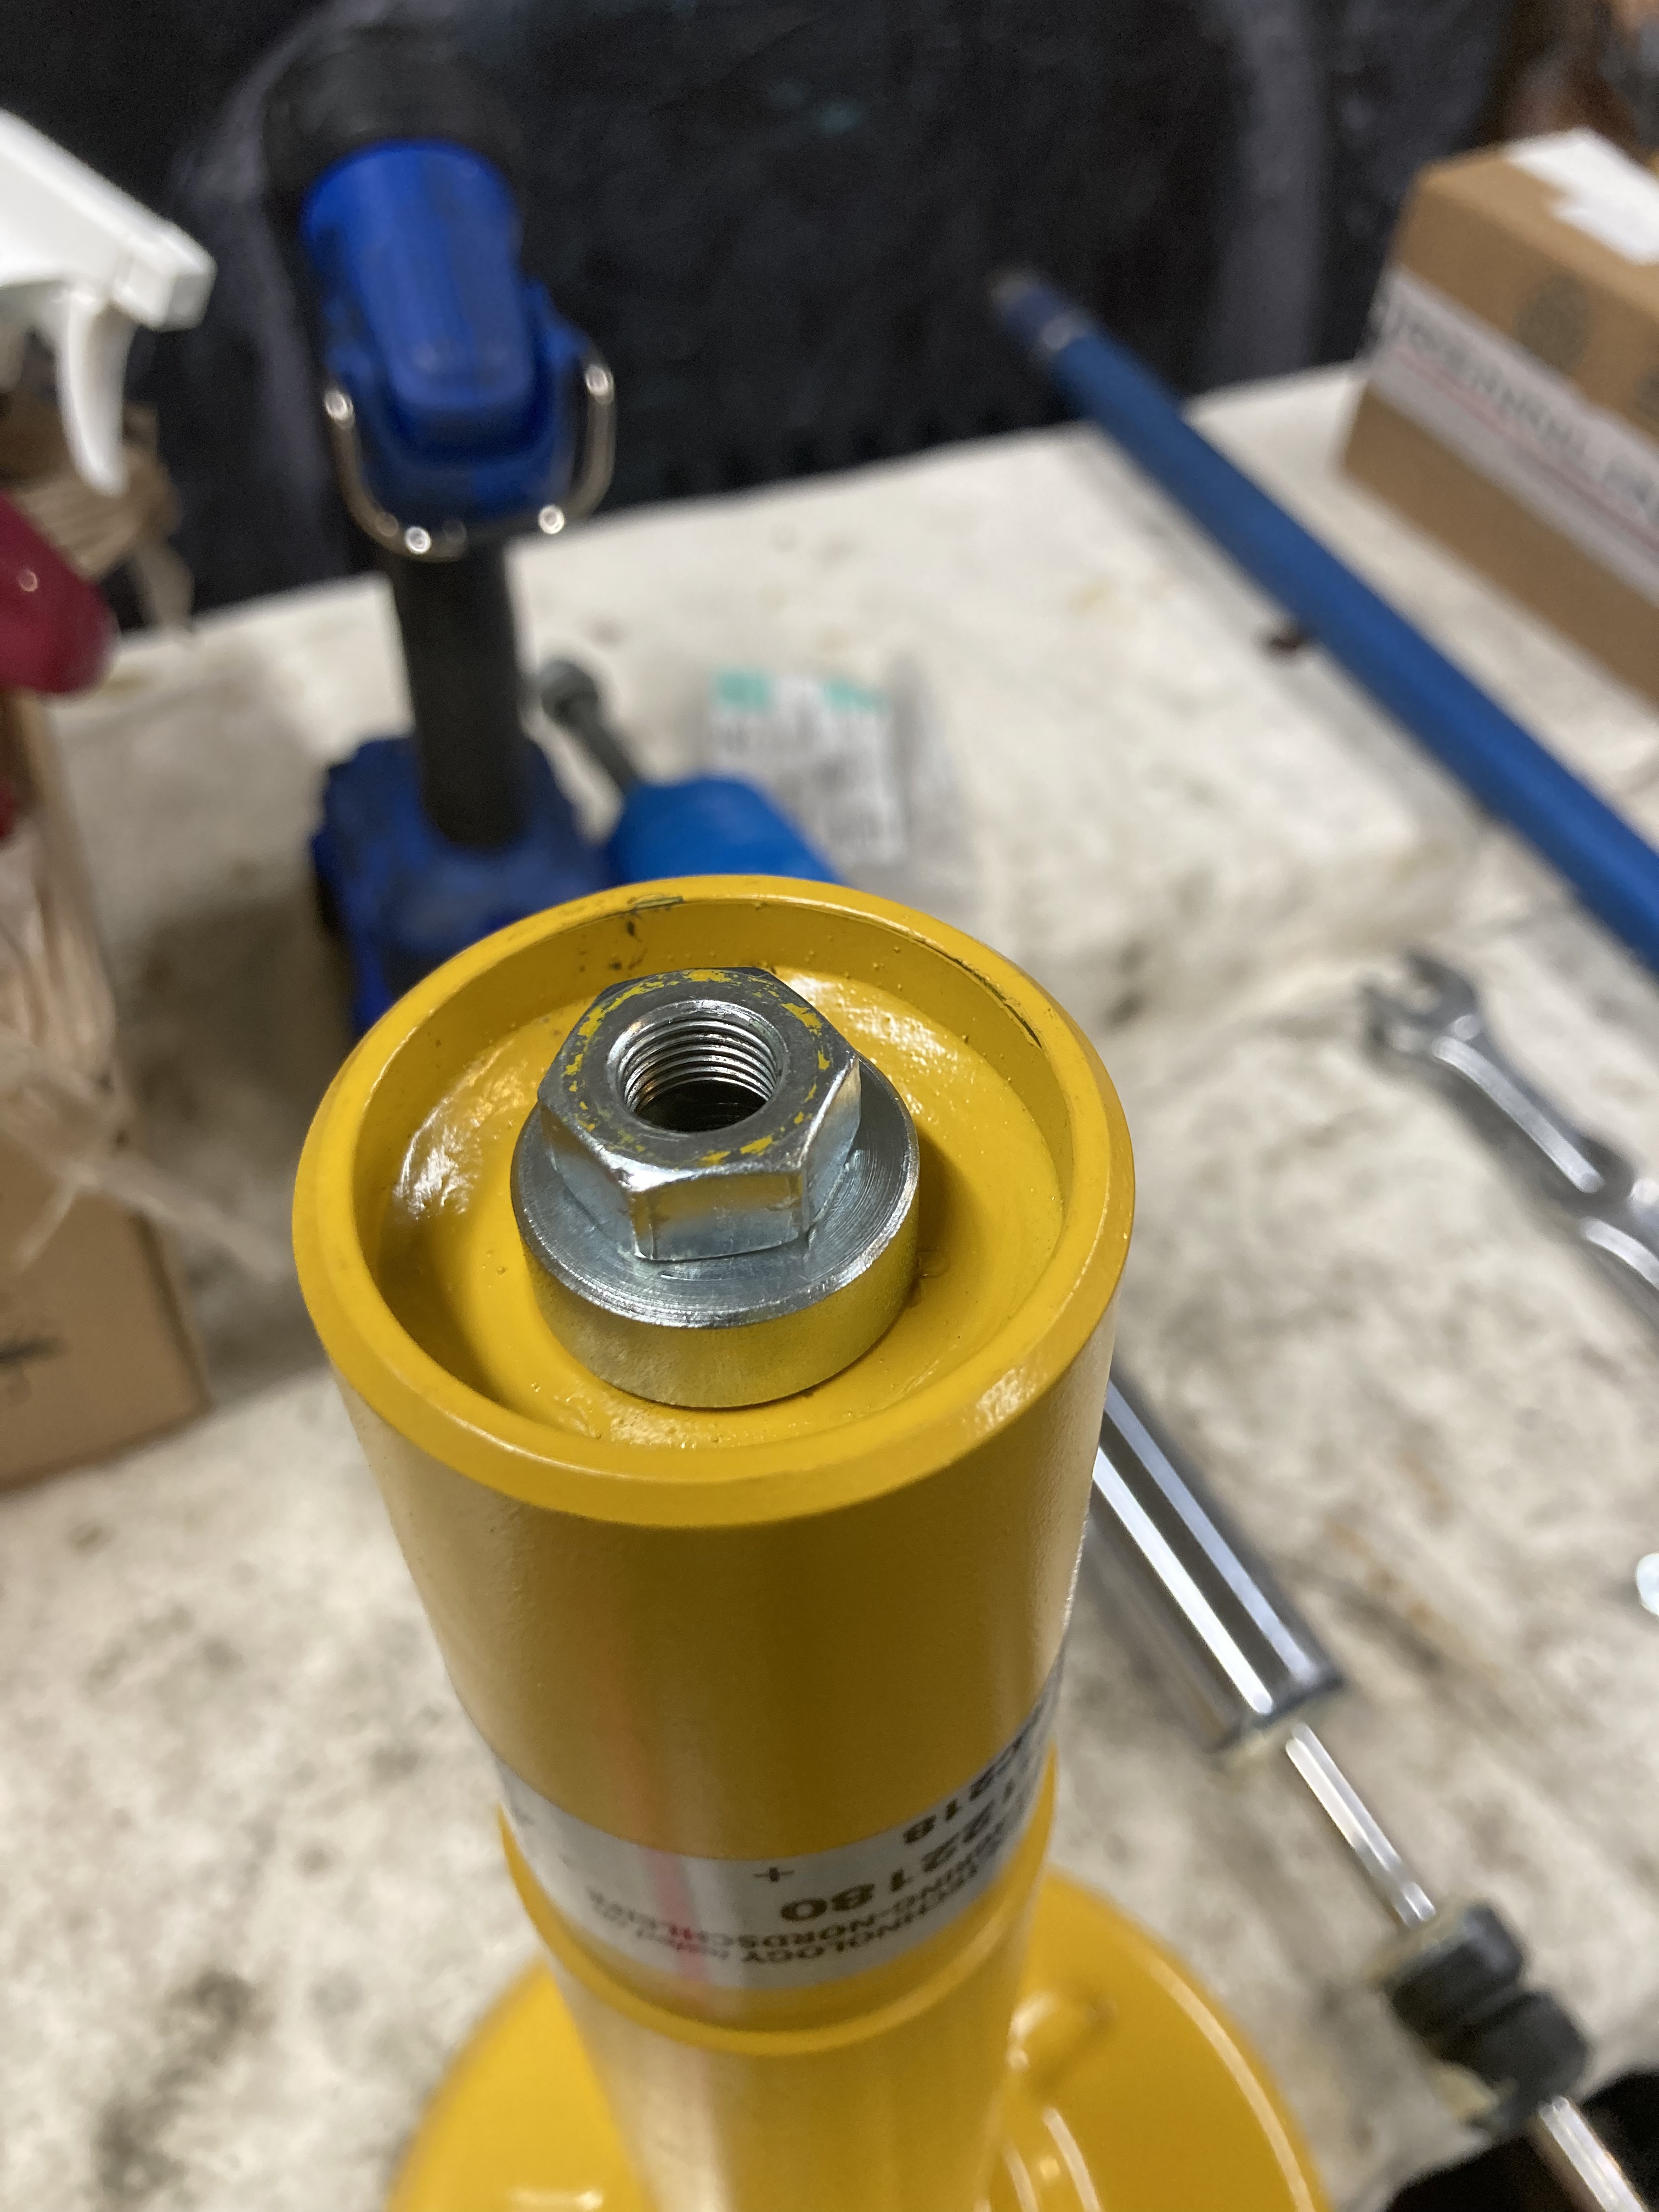
The first hurdle was to modify the front struts to get them legal per SCCA street class length rules. The extended length was about 0.4″ longer than the allowed 1″ longer than stock. An easy solution was found that shortened the extended length without having to open up the damper and without having to cut and rethread the hardened shaft.
The solution was to drill out the threads in the bottom of the housing where the shaft attaches and weld on a spacer and a new nut. This pulls the shaft attachment point down to reduce the extended length. The effect is to reduce the increased droop travel that the B6 has over the stock B4 strut. Prior to welding it looked as below.
B6 Front Extended Length Correction
The second issue was to engineer a completely new set of bumpstop stacks that would work with the B6 inverted design. The B6 shaft is only 11mm in diameter, much smaller than the B4 front and rear shafts so the polyurethane donuts I used before which had 5/8″ ID holes wouldn’t work. Plus, they were too big on the OD as well. The B6 carries the bumpstops internal to the housing. This means that I needed bumpstops with both smaller ID and smaller OD yet with the same spring rates as before.
Bumpstop Length Discussion And Word Of Warning
The Street class rules on bumpstops for struts contain the limitation that the length of the strut at the point where the bumpstop is contacted cannot be longer than stock.
Without this provision you could fill the motion gap with a longer bumpstop, allowing any street-class car to have any spring rate desired starting precisely at the static ride height. All cars in Street would immediately do this and obtain race-car stiffness, plus cause all sorts of issues with damping. (Ask me how I know!)
With this limitation the use of alternate bumpstops is limited by the manufacturer’s stock design. For cars that use the standard short and stiff bumpstops there is no ability to use the bumpstop as an auxiliary spring. It’s never contacted during normal running, even at the cornering limit. The Corvettes I’ve run in the past were like this.
The ND Miata in C-Street is not like the Corvette. Mazda designed the bumpstops to be contacted during cornering where they increase roll rate and affect lateral force distribution front to rear. Porsche did the same with the Cayman, just as they have done on most or possibly all of their sports cars starting in the 1980’s AFAIK and up through at least the 997/987 cars.
As a result, all the fully-prepped ND Miatas in C-Street that I have knowledge of use aftermarket bumpstops cut to various lengths. There seems to be a basic recipe for this strategy. I take it on faith that they are done in a legal manner.
There’s a catch, however, regarding bumpstop maximum length.
If the stock strut is used, or if an aftermarket strut is used that conforms exactly to certain key stock dimensions, then the maximum length of an aftermarket bumpstop is the same as the length of the stock bumpstop. That’s simple enough. This was the case with my Cayman when I was using the stock struts. I bought one each new stock front and rear bumpstop (since the originals were mostly powder) and measured them to establish the limits.
If the aftermarket strut is not dimensionally identical to the stock strut, however, then measurements must be taken and the maximum allowable length of the bumpstop must be calculated to assure meeting the provision in the rules above. This is not necessarily a simple task.
No manufacturer has any obligation to design aftermarket struts or shocks to meet SCCA autocross rules. In fact, they have every incentive to alter the design to provide better performance to justify their purchase. I know of more than one case where a well-respected supplier of aftermarket equipment for SCCA Street class has provided illegal equipment to unsuspecting clients.
In the case of the Bilstein B6 aftermarket strut, even though it’s a direct replacement for the stock B4, designed to use the stock spring and has the exact same spring perch location, it has other differences. After taking measurements and doing the calculations I found that the allowable bumpstop length for the fronts was almost 1” shorter than the stock bumpstop! That was very disappointing as I think longer is better even if the strut length at the point of contact is the same.
In the rear the allowable max length got slightly longer.
So, neither the front nor the rear allowable max bumpstop lengths for the B6 struts were the same as the stock bumpstops and I had to factor this into the new stack designs.
By the way, I carry a copy of the measurements and calculations in the glove compartment of the car if anyone desires to inspect it at an event.
New Bumpstops
I was able to find a smaller style of polyurethane donut, use a higher durometer formulation and physically alter the shapes to allow them to fit inside the lower housing of the strut and provide the desired stiffness.
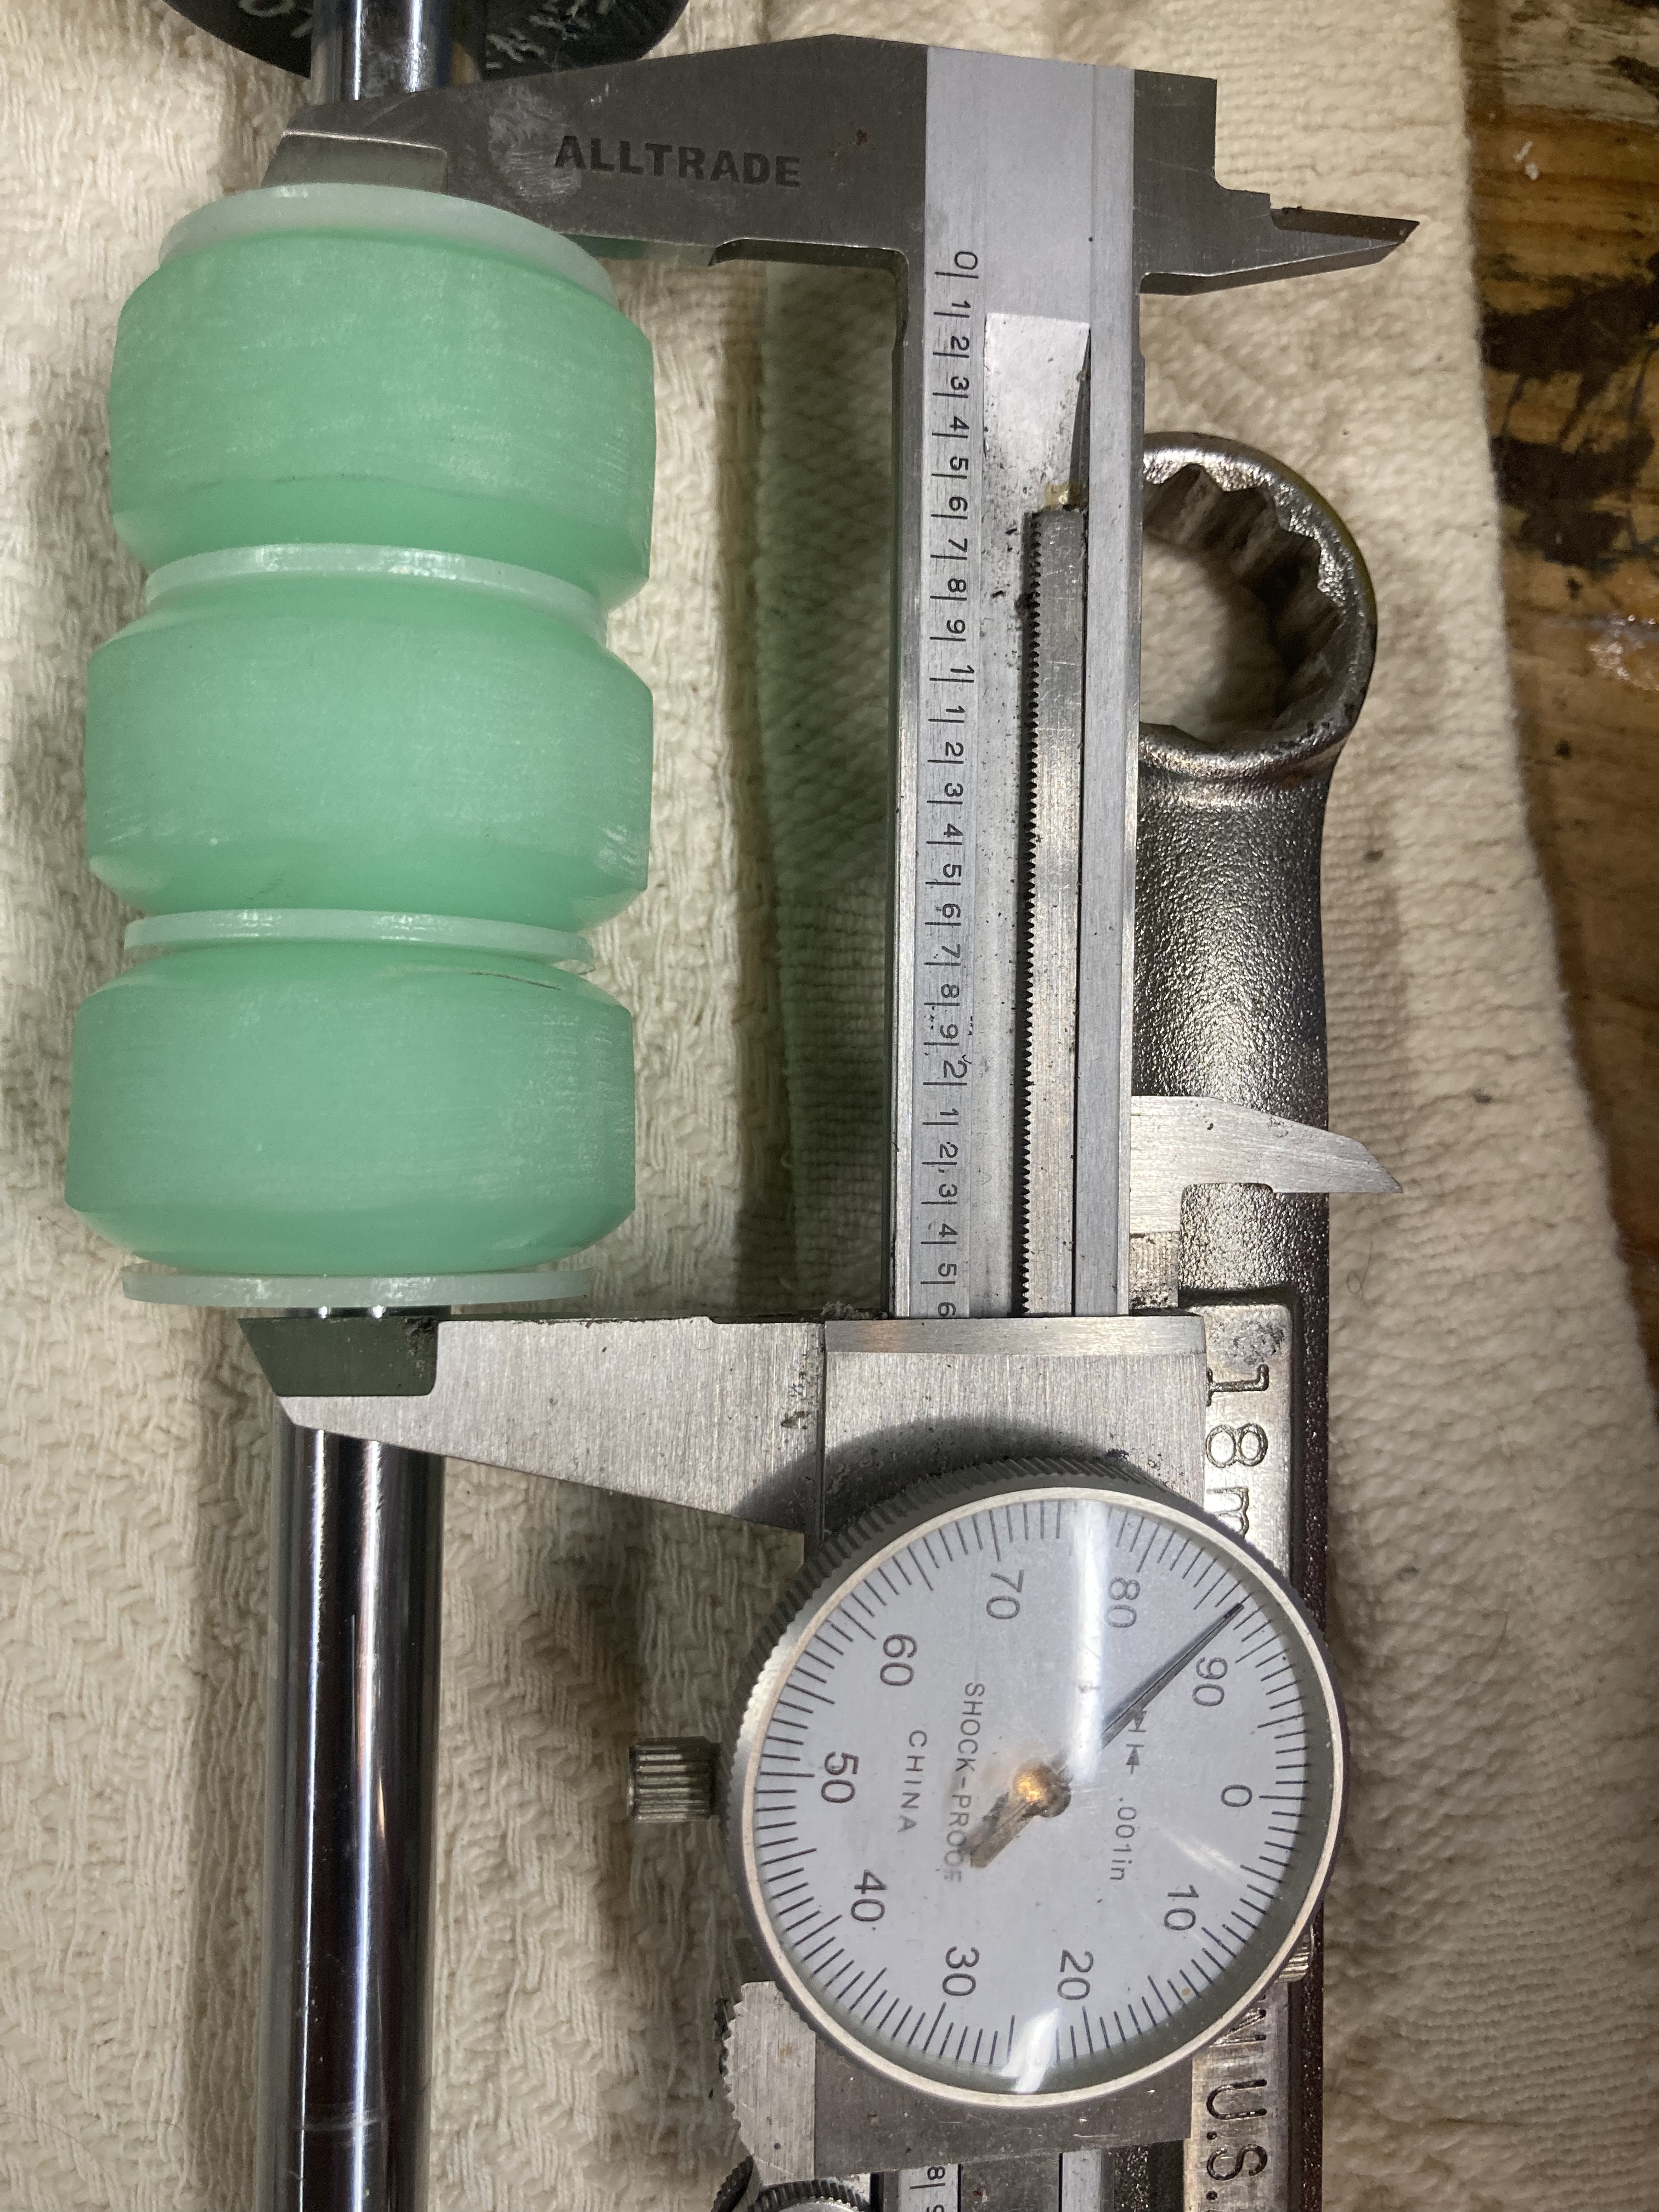
Engineered Rear Bumpstop Stackfor the B6
The rear stack is shown above. Notice that material has been removed from the OD making the surface flat instead of oval. I removed 10% of the mass in an attempt to reduce the rate by 10%. Plastic spacers were used to get the total height up to the maximum allowed. I want contact to occur as early as legally possible because I’m trying to limit roll to reduce loss of negative camber.
Engineered Front Bumpstop Stack For The B6
The front stack is shown above. In this case the OD has been slightly trimmed for fitment and the mating surfaces have been trimmed to reduce the stack height to the maximum allowed, which is shorter than the rear for the B6 struts.
Chicago Tour
For the remainder of the season until after Nationals I installed 255/295 Yokohama A052 tires. I had trouble with my trailer, didn’t have time to diagnose it, so I drove the Cayman to Rt. 66 Raceway in Joliet, Illinois for the Chicago Tour. This was almost a disastrous decision.
The car seemed weird at the Tour. It was OK, but weird. It no longer made big vertical bounces, thanks to the increased damping in the B6 struts, but the car was jittery over sharp bumps and things were now limited by a distinct push, opposite the case at Bristol. I generally drove well, but it was a chore and the car made a strange noise in left turns. I placed 6 of 7, but was encouraged that my delta to the winner, the same winner as at Bristol, was a little bit smaller.
In Grid At Rt. 66 Raceway
When I returned home I couldn’t get an appointment to have the front struts revalved before the next national tour event at Grissom. My shock guy was too backed up. He can’t work on them until after Grissom. (The rears will have to wait even longer.)
Just before leaving for the next event I removed the front wheels in order to reduce the front bar stiffness by one hole, hoping to decrease the understeer. I found black rubber on the underside of the spring perch on the right side. The perch paint had been rubbed off by gravel. Hmmm. There was essentially no clearance between the spring perch and the running surface at the top of the tire. I looked at the bottom of the strut and saw that it appeared to have contacted the lower ball joint stud. (See pic below.) The entire strut had obviously slipped position in the upright. That’s when I remembered.
I remembered that on the way to Joliet, in one of the 14 lane closures/construction zones along I-57 that I went through, I hit a sharp dislocation in the surface. It felt like a 3″ change in height and I was going ~60mph. There had been no warning signs. There was a large impact and a metallic clank from the right front. I watched the tire pressures to see if the tire had been damaged and felt for the vibration of a bent rim. All seemed OK. I breathed a sigh of relief.
Impact CausedThe Strut To Slip Downward And Contact The Lower Ball Joint Stud
In actuality the right front was now almost an inch low. The alignment and the corner balance had to be totally wonky. That was the condition for my runs at Chicago.
Once home I loosened everything and reset the strut to the stock position. The sheet-metal tab that normally indexes the stock position had been bent all to hell. I bent it back, expecting it to break, but it didn’t. I set the front bar less stiff and loaded the car onto the (repaired) trailer for Grissom. I didn’t have time to check the alignment.
Grissom
The car was better at Grissom… it was no longer weird. The understeer was lessened, but still there. The jitter over sharp bumps was still there.
The jitter is probably caused by excessive damping in the B6 struts. The B6’s have too much damping, especially at high velocity, in both bump and rebound, even when riding on the really stiff bumpstops I’ve installed. This excessive damping impairs grip, especially over sharp bumps. The unsprung masses are being over-controlled. I think these struts are damped to a level where even the most insensitive driver will exclaim on the first drive after installation, “Woah! What a difference!” That driver will probably never know how much grip at the limit has been sacrificed. And we worry about autocrossers screwing up their cars!
Once Day 1 was in the books I was in 3rd place of 7, the last trophy position. The big news is that I was much closer to the leader than before.
I was only 0.021s ahead of 4th, so it was a great battle on day 2. The car didn’t miss a beat but I slipped to 4th, still in front of two very good drivers in NDs plus an NC.
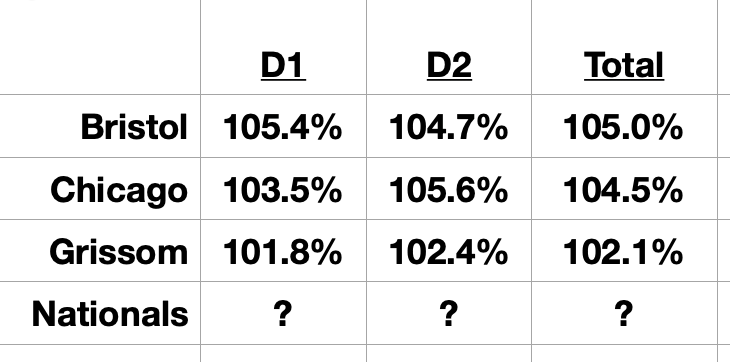
Here are the national tour results for the car the way I look at them:
Amount Slower Than The Winner
What I’ve done above is to calculate the percentage slower I was each day than the leader, who was the same person at all three events and is probably the favorite for the jacket this year. At Bristol on day 1 I ran a time 105.4% of the winners time, so I was 5.4% slower. Similarly, I was 4.7% slower on day 2. That put me exactly 5% behind the leader for the two day total. That’s a long way back. That’s 24th of 34.
A Chicago, the first event on the B6 struts and Yokohama tires, I was marginally better. The wonky suspension may have been holding me back.
Then at Grissom there was a big leap forward. I know, it’s just one event, but the surface is very similar to Lincoln. By the way, the guy who took 3rd away from me on day 2 got the last trophy position in C-Street at Nationals last year.
The reason for tracking in this manner is because the goal for this year has always been to trophy at Nationals in C-Street with this car. Tracking these percentages is a way to answer the question: am I anywhere close?
Well, last year in C-Street at Nats the last trophy position was 2.4% behind the winner. In 2022 the last trophy position was 2.0% behind the winner. By way of comparison, last year I took the last trophy in B-Street. I was 1.9% behind the winner.
Judging by the Grissom result a trophy spot this year is within the realm of possibility. If revalving the front struts gives me some additional front grip that could make the difference.
I put a pair of 295 Yoks on the rear as a fit check and went to my local TAC 6 event with no other changes, including the same tire pressures. It was a disaster, but at least the tires fit!
Way too much oversteer tendency meant that I could not aggressively trail-brake into corners without losing the rear end, which I proceeded to do time after time. If I beat people that’s usually where I do it: on corner entry. I placed a disappointing 4th in C-Street and 22nd overall of 114.
I learned a lot by comparing my data to the winner of CS who was kind enough to give me his data. In return I created a set of charts analyzing the differences corner by corner. Besides my driving mistakes, the data showed that the Cayman has a very slight acceleration advantage over the ND Miata in both 1st and 2nd. Meantime, the Miata seemed to have a slight grip advantage, but that may be due to the limitations of the Cayman oversteer situation. At least I hope so, because this entire enterprise is predicated on the Cayman having a grip advantage inspite of its weight. It may be that I’m running into the reality that lack of front camber is always going to limit peak cornering gripto less than the Miata.
The next event was with the Alabama Region of the SCCA at Barber Motorsports Park outside of Birmingham. Prior to the event I dialed in a healthy amount of toe-in in the rear to cure the oversteer. It worked. The rear was now super-stable and I won CS in front of two ND drivers that beat me the weekend before at TAC 6. I won by over half a second on a 43 second course.
It was too much toe (5/16″ total) because the car would now push powering out of a corner. This car had never done that before. It was also really hot. I had a co-driver (who will drive with me at Bristol) and we confirmed again that you can overheat Bridgestones on a hot afternoon with six runs if you don’t water early.
The Barber Proving Grounds surface is very smooth with consistently high grip. This meant that the present lack of damping wasn’t so critical, i.e. the car wasn’t bouncing badly as is likely to happen at Bristol.
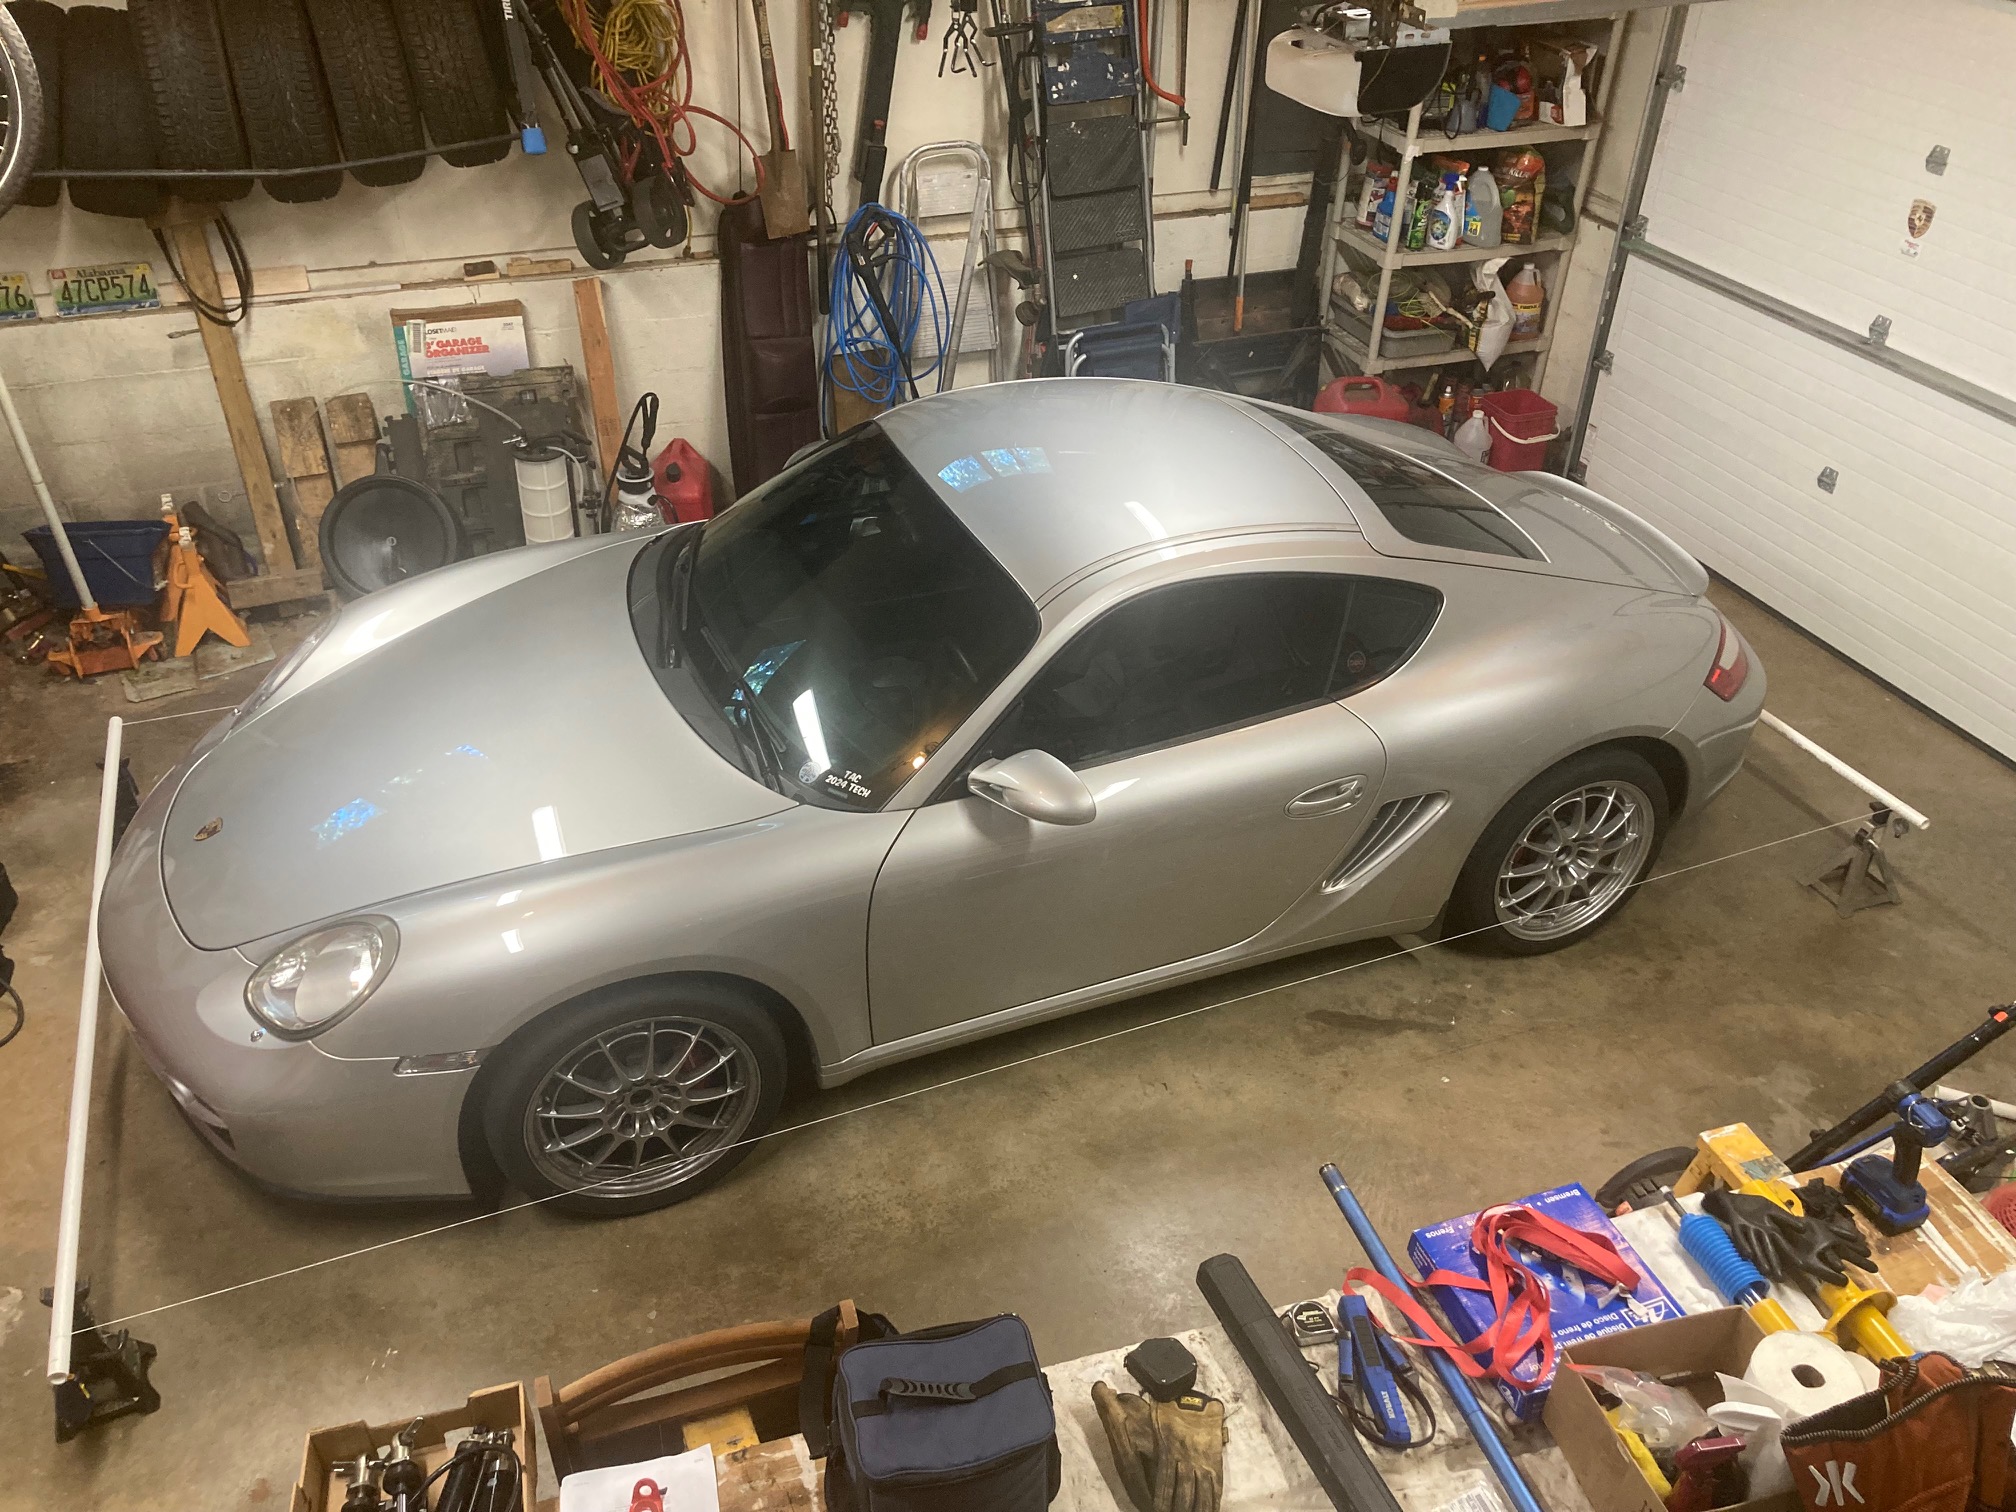
Back home I fabbed a string setup in order to produce an accurate alignment. (I didn’t feel like leaving the car all day with the kids that work at my local alignment shop like they insisted. That’s two shops that can’t figure out how to make an appointment system work, so I decided to do it myself.) Initial results were that the front tires are both pointed to the right!
String Alignment Setup
It took only a single iteration on the strings to get what I wanted. The car is now at zero front toe while straight on the axis, and 7/32nds (measured across 19.5″) total toe-in in the rear, split equally to each side and straight on the axis. (7/32nds = 0.32 degrees per wheel) I know that this is more toe-in than most people use for these mid-engined Porsches. It may get reduced later. But, I like to be very aggressive on trail-braking into corners so rear stability when the rear gets light is needed, as least for my confidence. I’ve driven other Caymans with minimal toe-in and they did not give me the confidence I needed when braking hard while turning.
This is the setup I plan to run at the Bristol Pro-Solo and Tour later this month.